There are two distinct methods for installing our Magento 2 extension: one involves utilizing Composer (primarily suitable for those who have procured it via the Magento Marketplace), while the alternative entails a manual process wherein you copy the essential files directly onto your server.
MAGENTO MARKETPLACE
Step 1: Update the Magento composer.json file
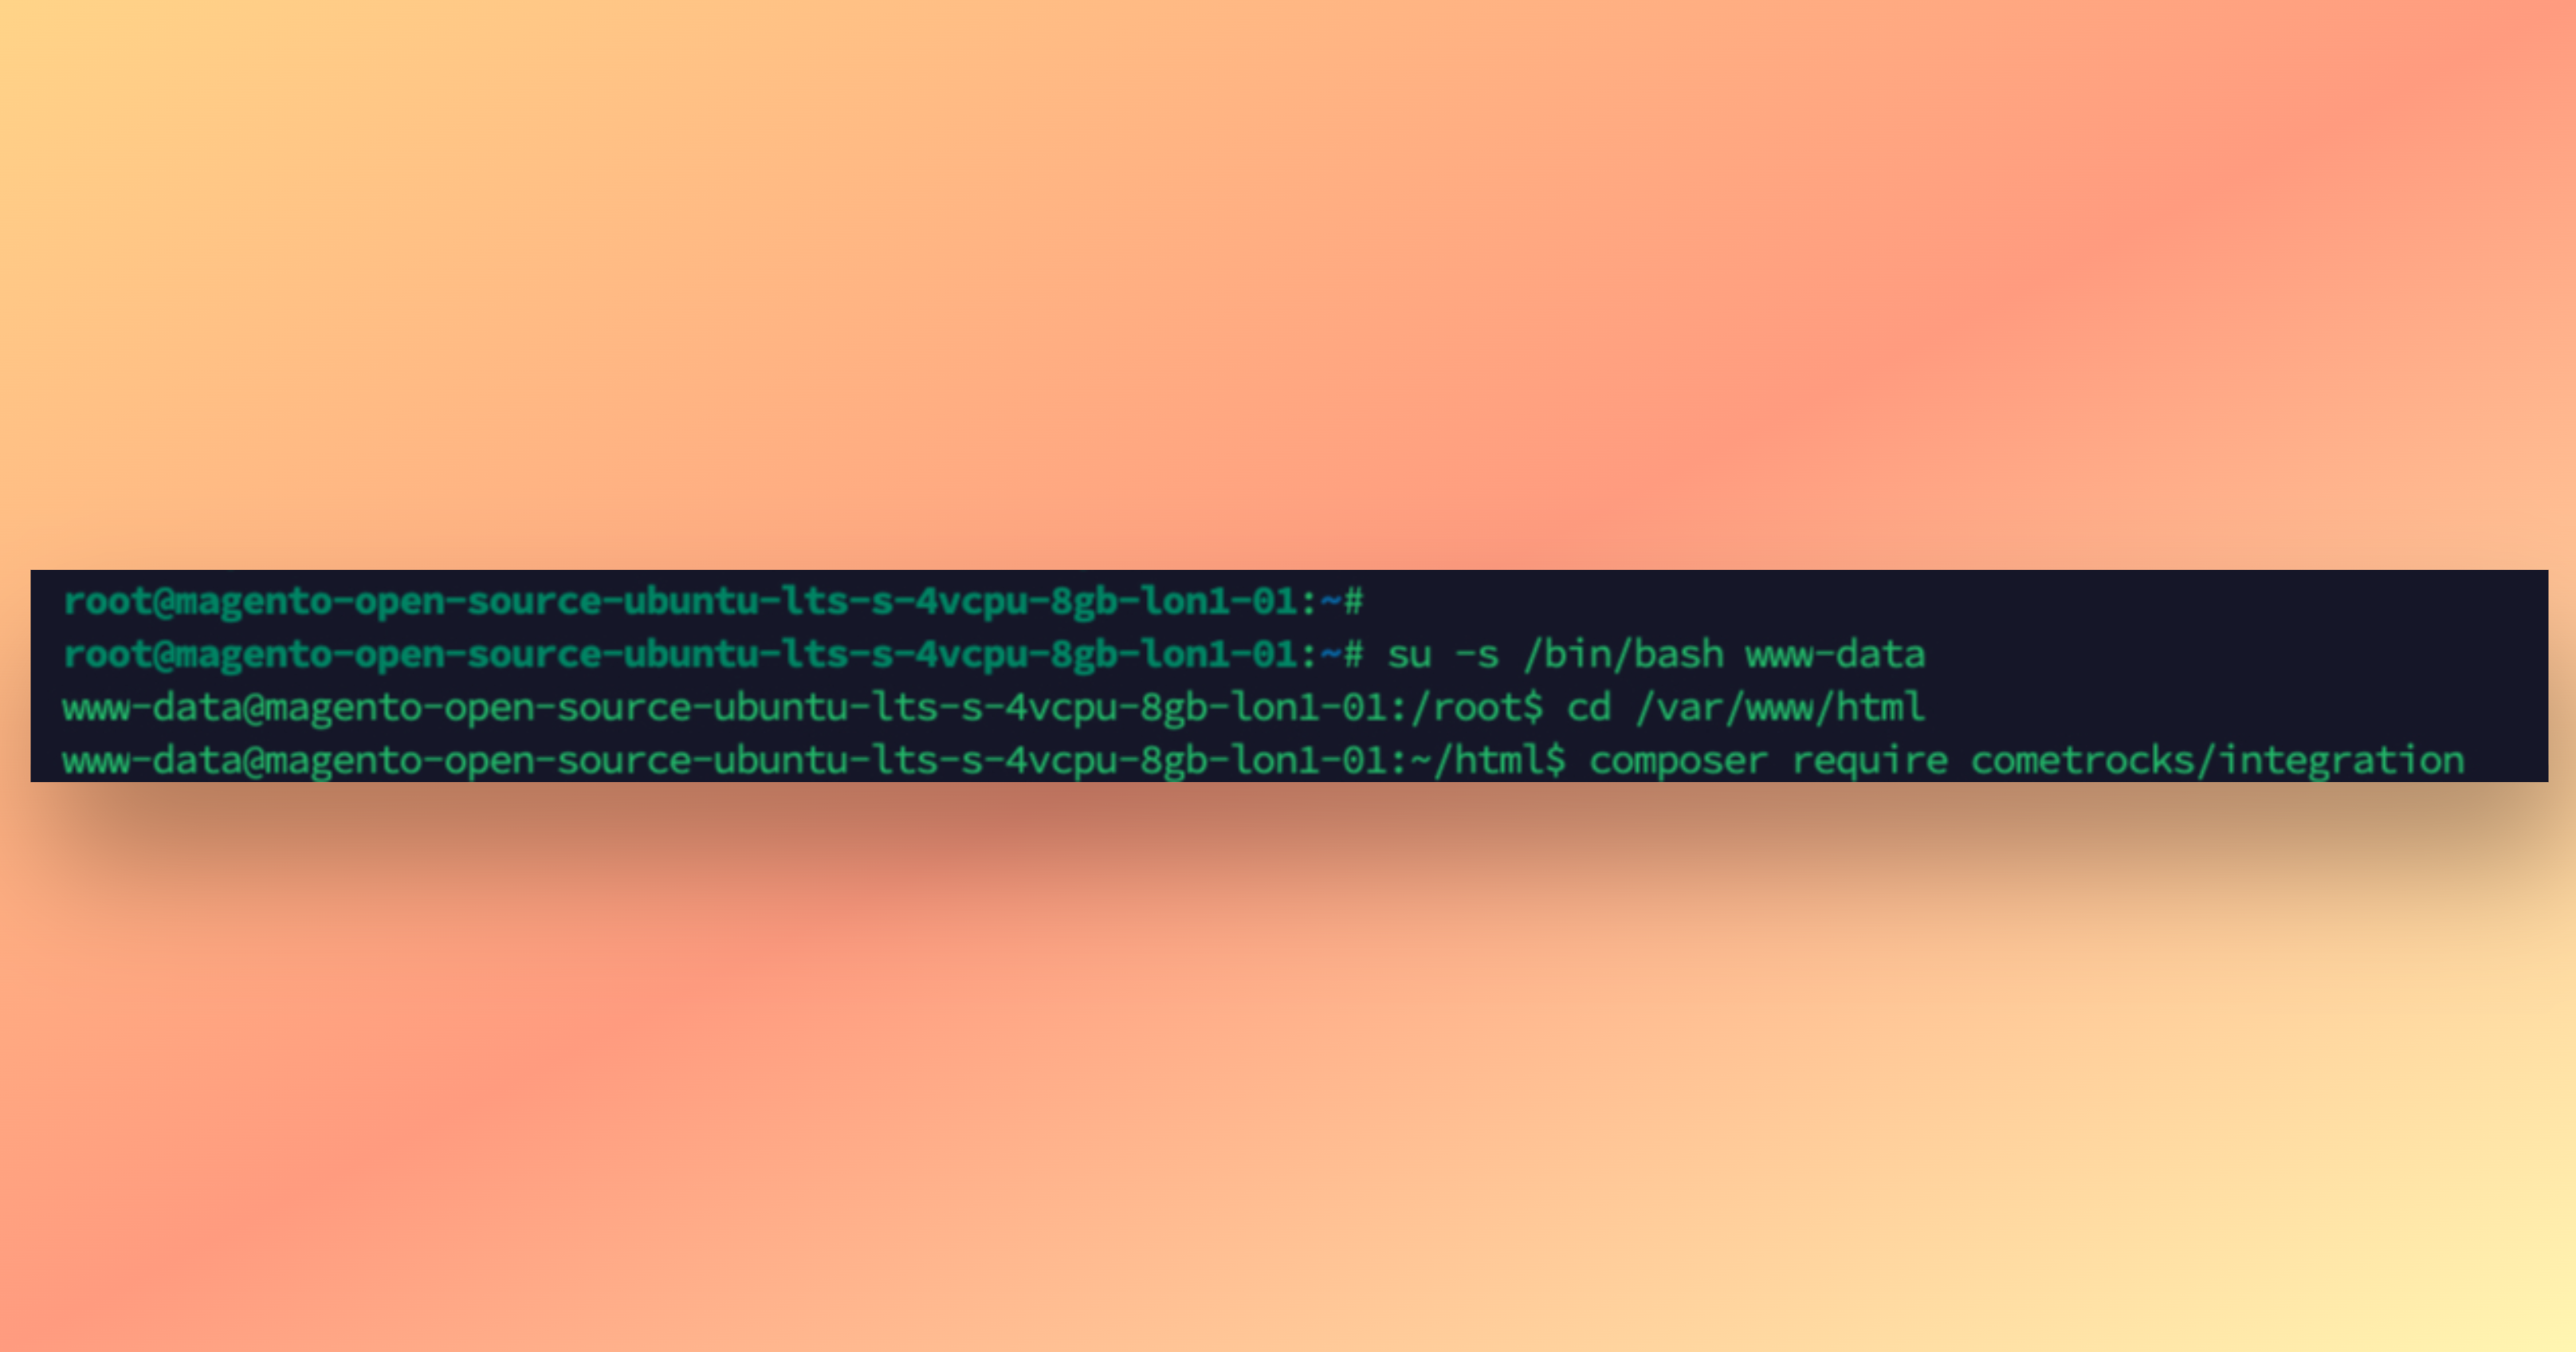
Log in to your Magento server as the file system owner and navigate to the Magento root folder to install the module via Composer.
Update the composer.json file from the command line interface (CLI) using:
composer require cometrocks/integration
Step 2: Complete the Registration of the Extension and Perform Essential Magento Tasks: Clear Cache, Deploy Static Content Files, and Compile PHP Files.
Execute the subsequent commands to successfully register the Magento 2 extension, compile the code, and deploy static view files:
1. php bin/magento setup:upgrade
2. php bin/magento setup:di:compile
3. php bin/magento setup:static-content:deploy (if your Magento is in development mode - you might want to run: "php bin/magento setup:static-content:deploy -f" instead (without quotes))
4. php bin/magento cache:flush

Important Note: Depending on your server configuration, you might need to execute these commands without the initial 'php' prefix, as shown here: bin/magento setup:upgrade. Additionally, on servers equipped with multiple PHP versions, it could be necessary to specify the appropriate PHP version, based on the PHP requirements of your specific Magento version. For instance: /usr/bin/php7.4 bin/magento setup:upgrade.
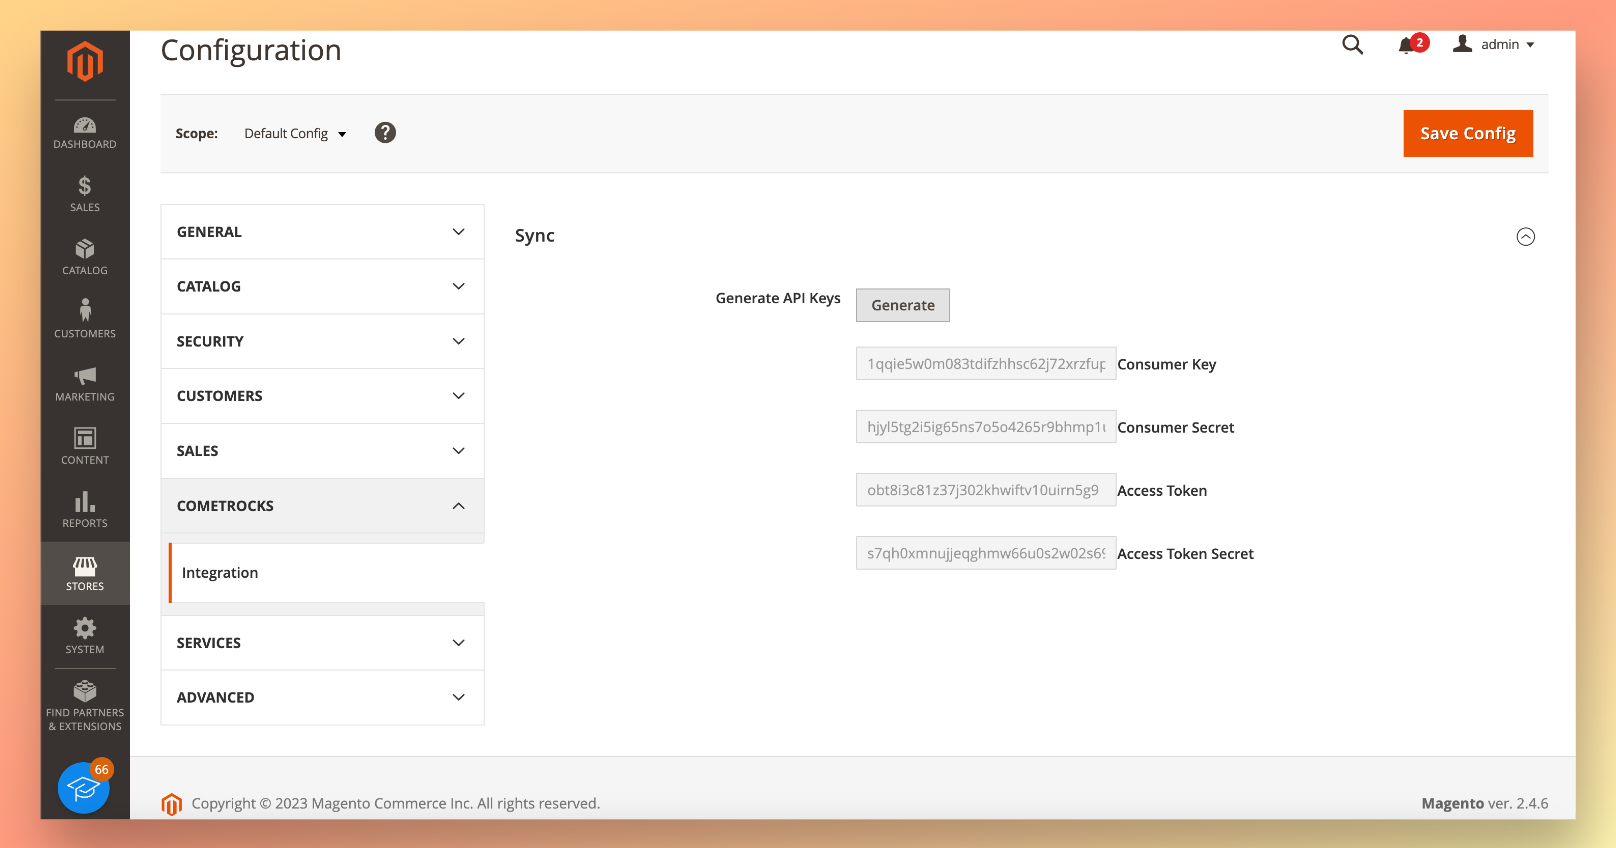
Step 3: API keys.
Access your Magento Admin panel and proceed to Stores > Configuration > COMETROCKS > Integration. Within this section, effortlessly generate API keys by clicking the 'Generate' button.
EXTENSION ZIP ARCHIVE
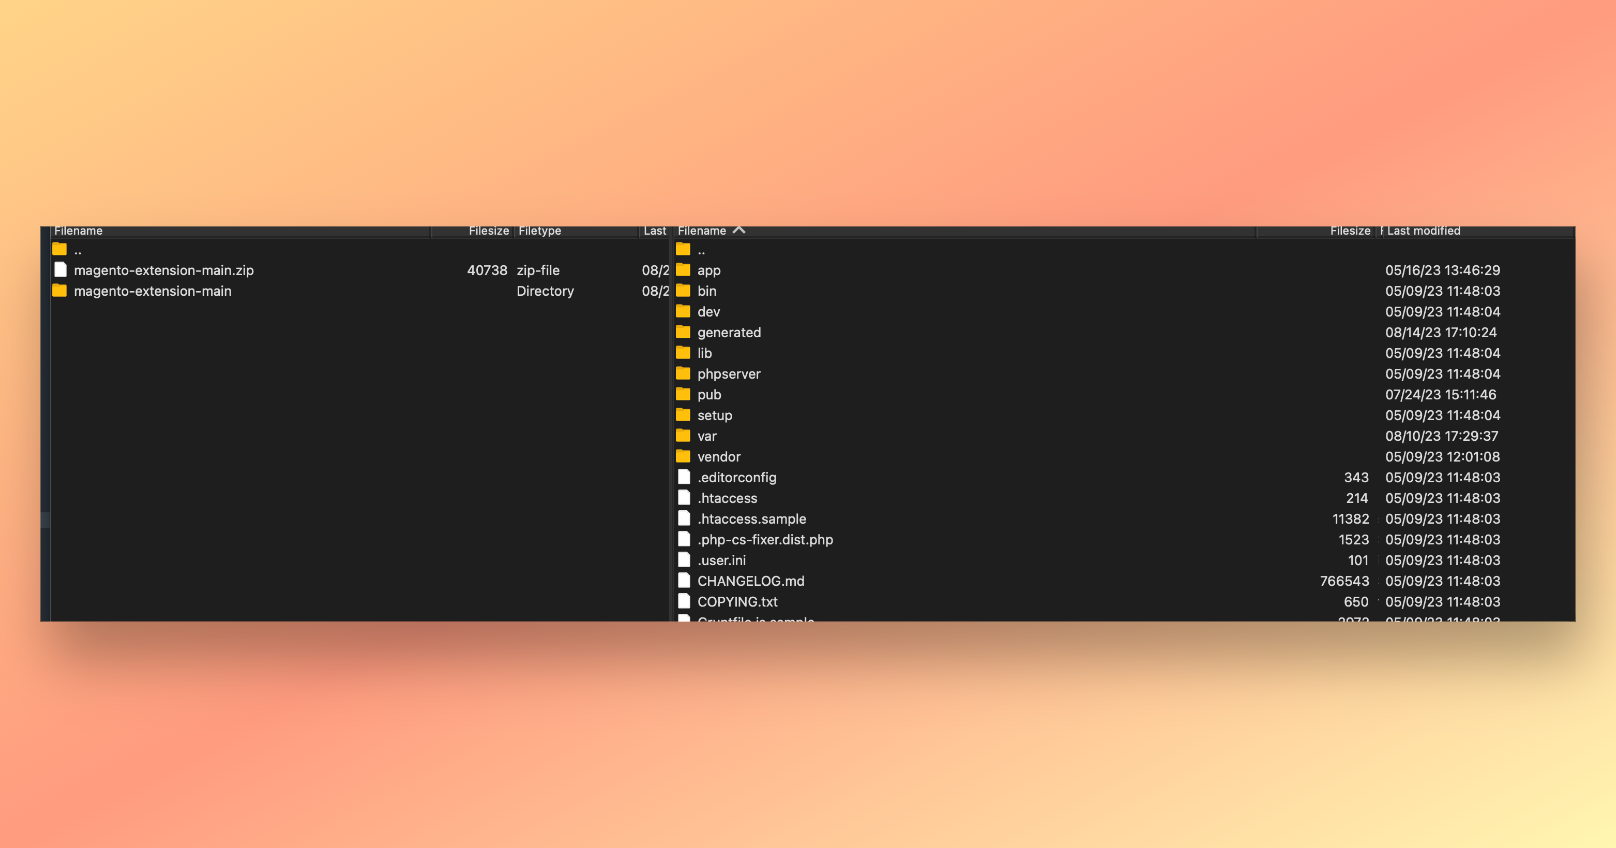
Step 1. Preparing files.
Unpack the archive you've received from our platform.
Step 2. Opening files on the server.
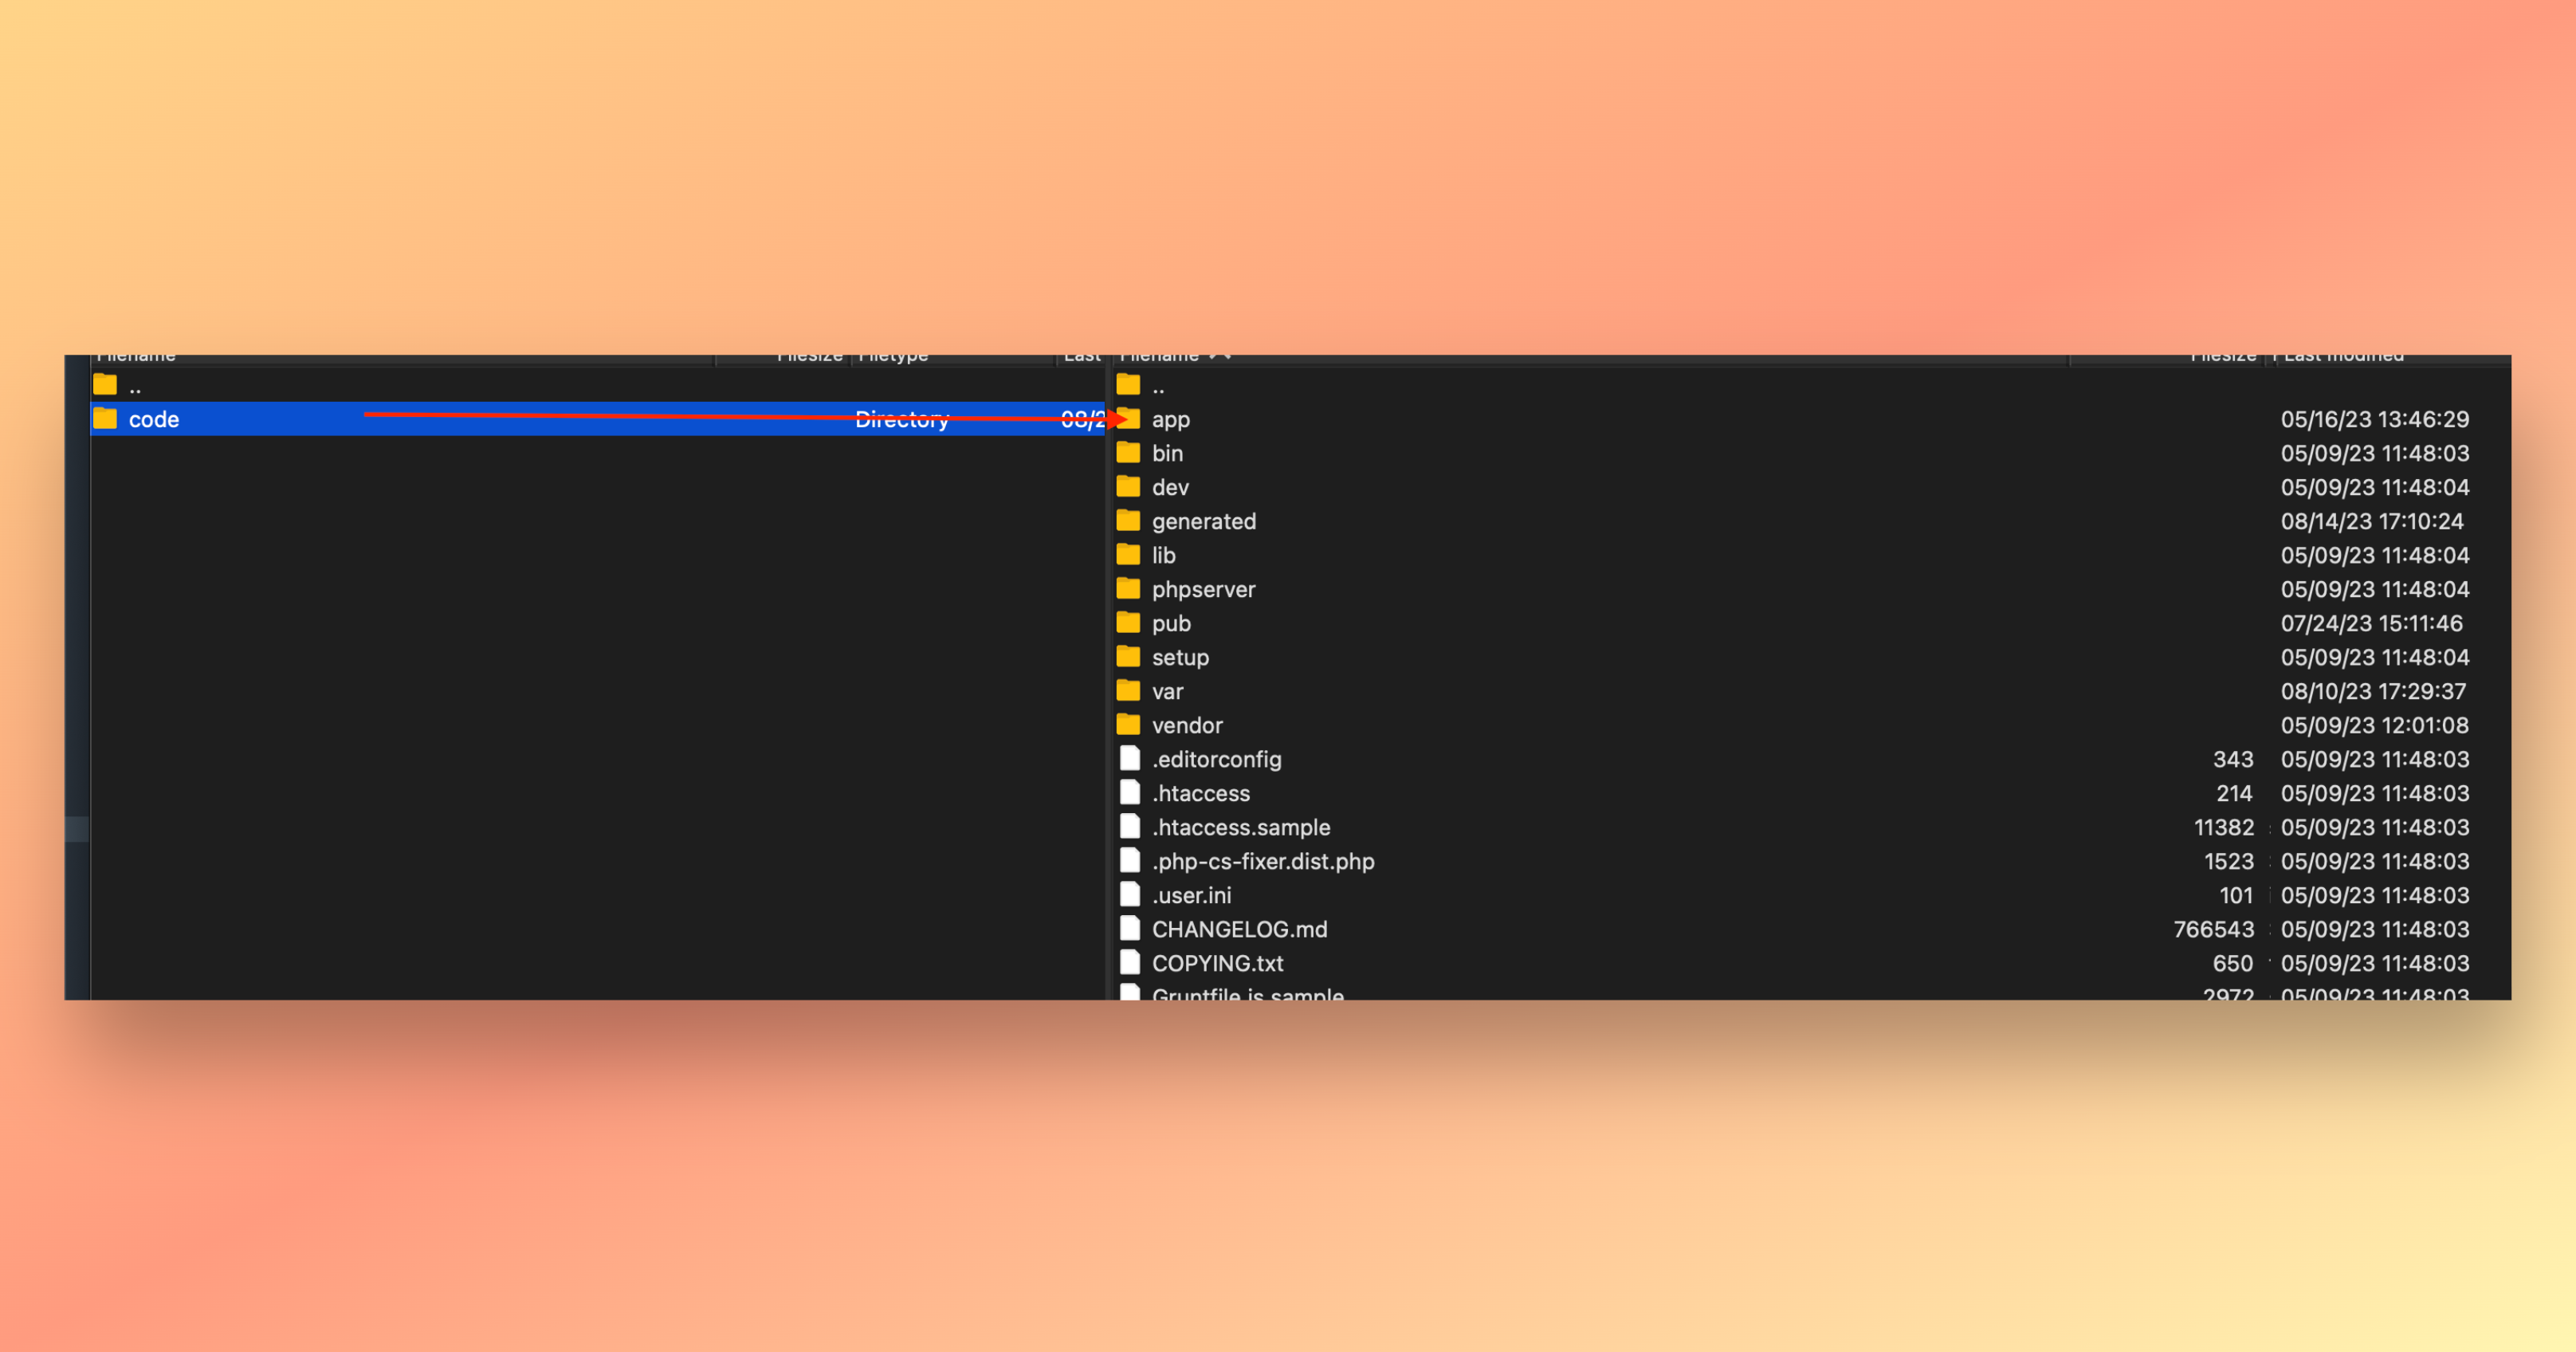
Sign in to your Magento server as the file system owner using an SFTP client, then navigate to the root folder of your Magento installation.
Step 3. Copying files.
Once you've extracted the archive, access the 'app/' directory within it, and proceed to copy the 'code/' folder into the corresponding 'app/' directory on your server.
Step 4. Complete the Registration of the Extension and Perform Essential Magento Tasks: Clear Cache, Deploy Static Content Files, and Compile PHP Files.
Execute the subsequent commands to successfully register the Magento 2 extension, compile the code, and deploy static view files:
1. php bin/magento setup:upgrade
2. php bin/magento setup:di:compile
3. php bin/magento setup:static-content:deploy (if your Magento is in development mode - you might want to run: "php bin/magento setup:static-content:deploy -f" instead (without quotes))
4. php bin/magento cache:flush
Important Note: Depending on your server configuration, you might need to execute these commands without the initial 'php' prefix, as shown here: bin/magento setup:upgrade. Additionally, on servers equipped with multiple PHP versions, it could be necessary to specify the appropriate PHP version, based on the PHP requirements of your specific Magento version. For instance: /usr/bin/php7.4 bin/magento setup:upgrade.
Step 5: API Keys.
Access your Magento Admin panel and proceed to Stores > Configuration > COMETROCKS > Integration. Within this section, effortlessly generate API keys by clicking the 'Generate' button.
Congratulations! Your Comet Rocks Integration is now fully installed and configured. Time to launch comet powered satellite and collab stores!