This is a guide on how to connect your Shopify online store to Comet Rocks. You will learn how to set up a store in Comet Rocks, how to create a custom app in Shopify, and submit API credentials to successfully connect your store.
1. Configure store details
First, set up your Comet store and provide the details of your Shopify store.
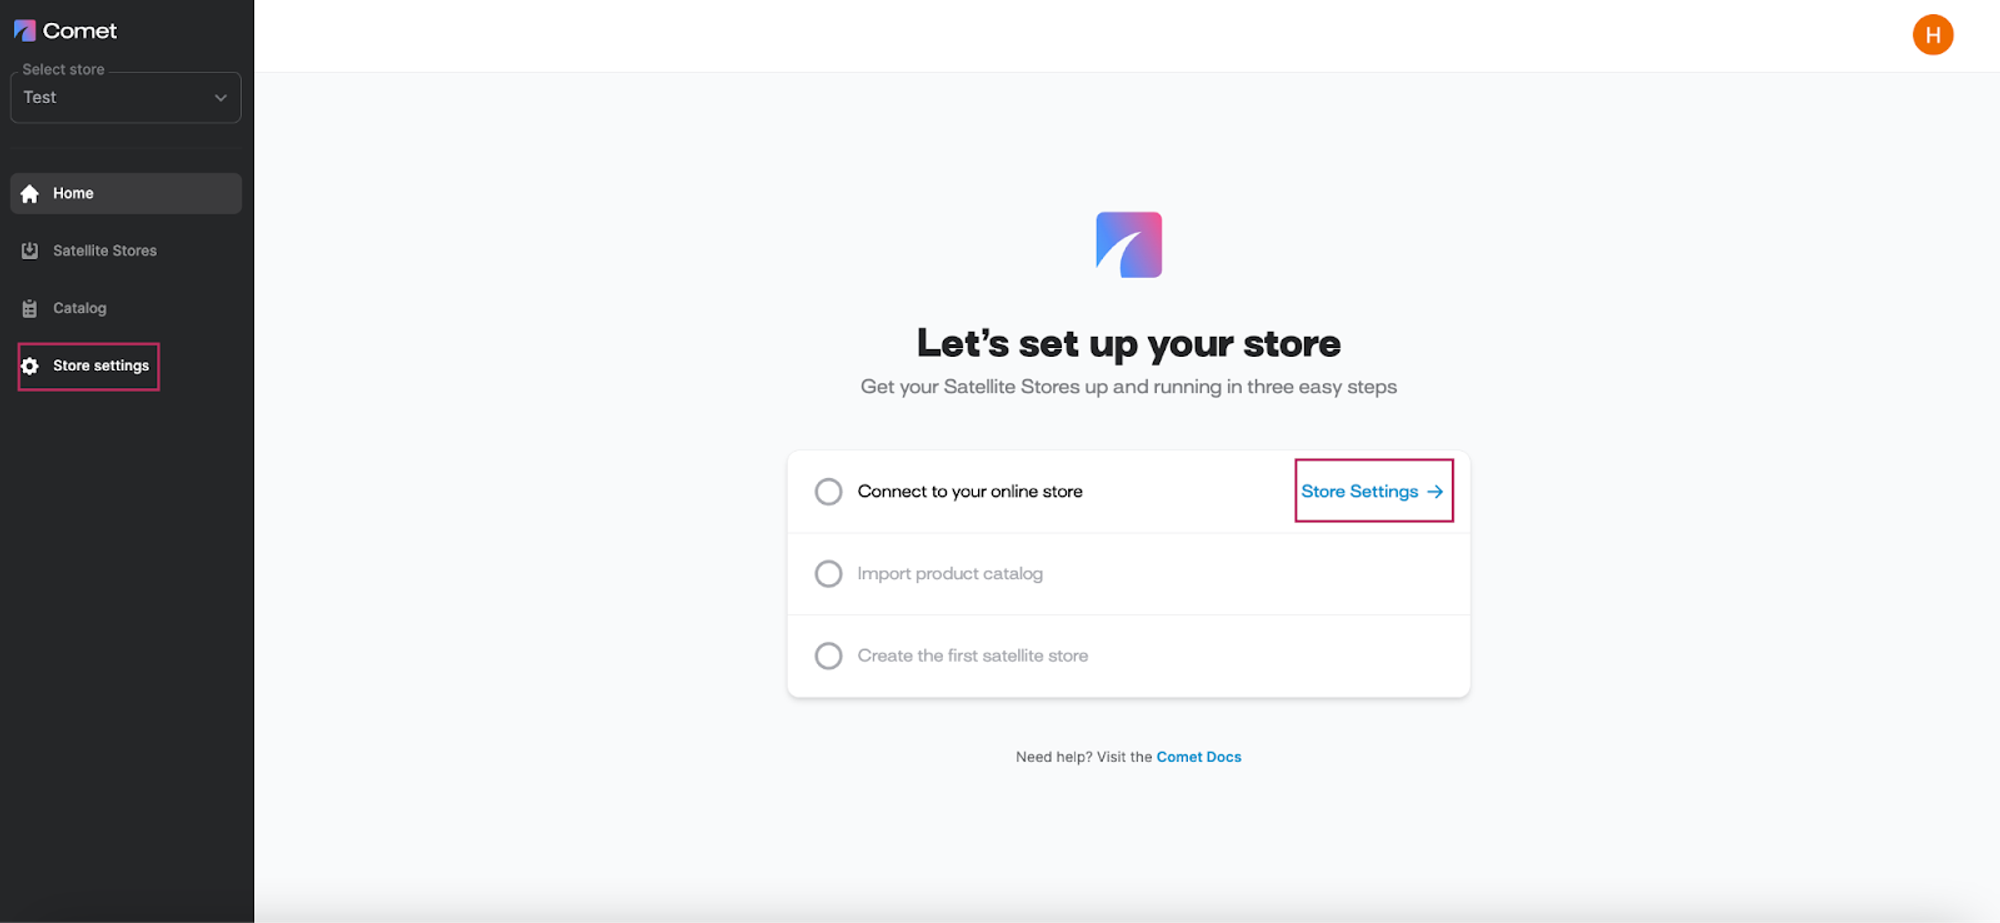
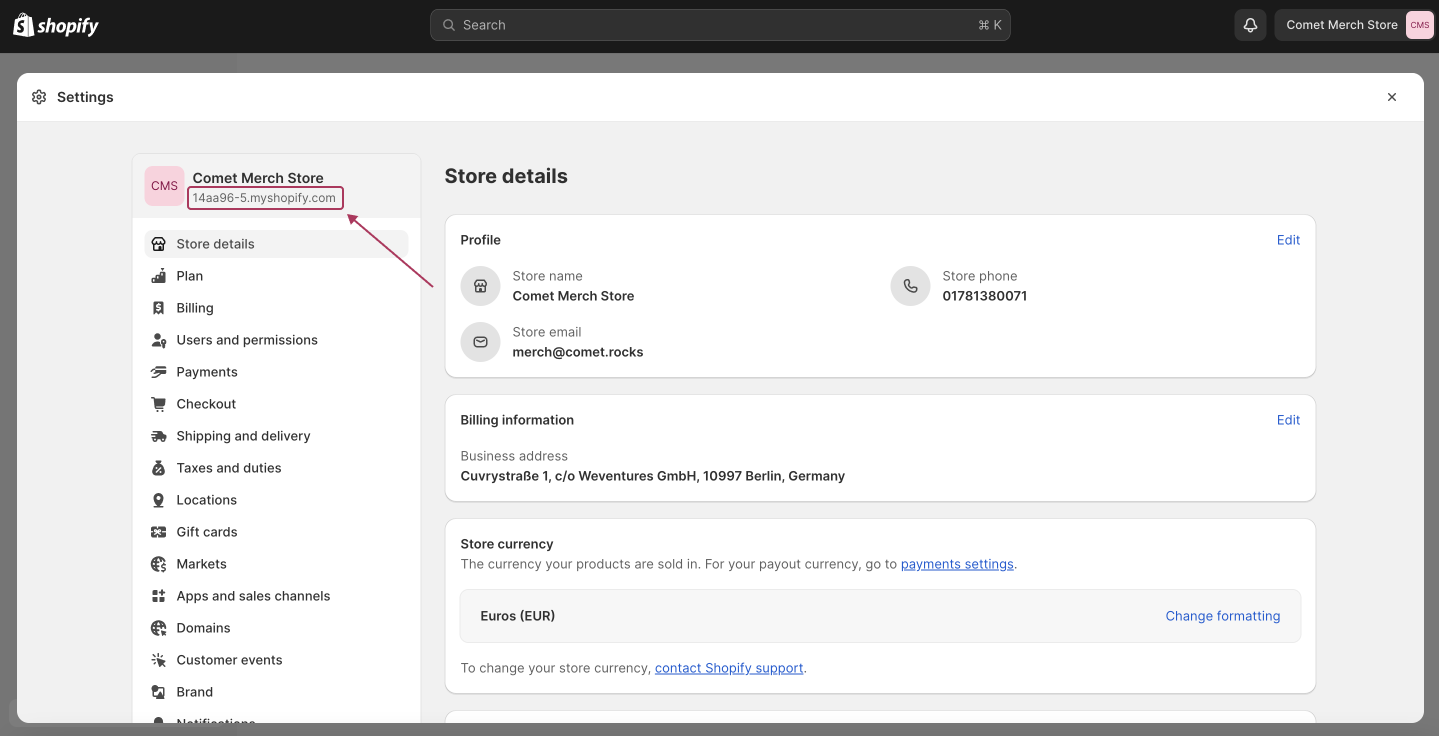
Log in to https://console.comet.rocks/auth and click on Store settings from the Home Page or tabs on the left
Add Store Information and URLTo set up a Shopify store in the dashboard, please enter the basic details of your store and click next:
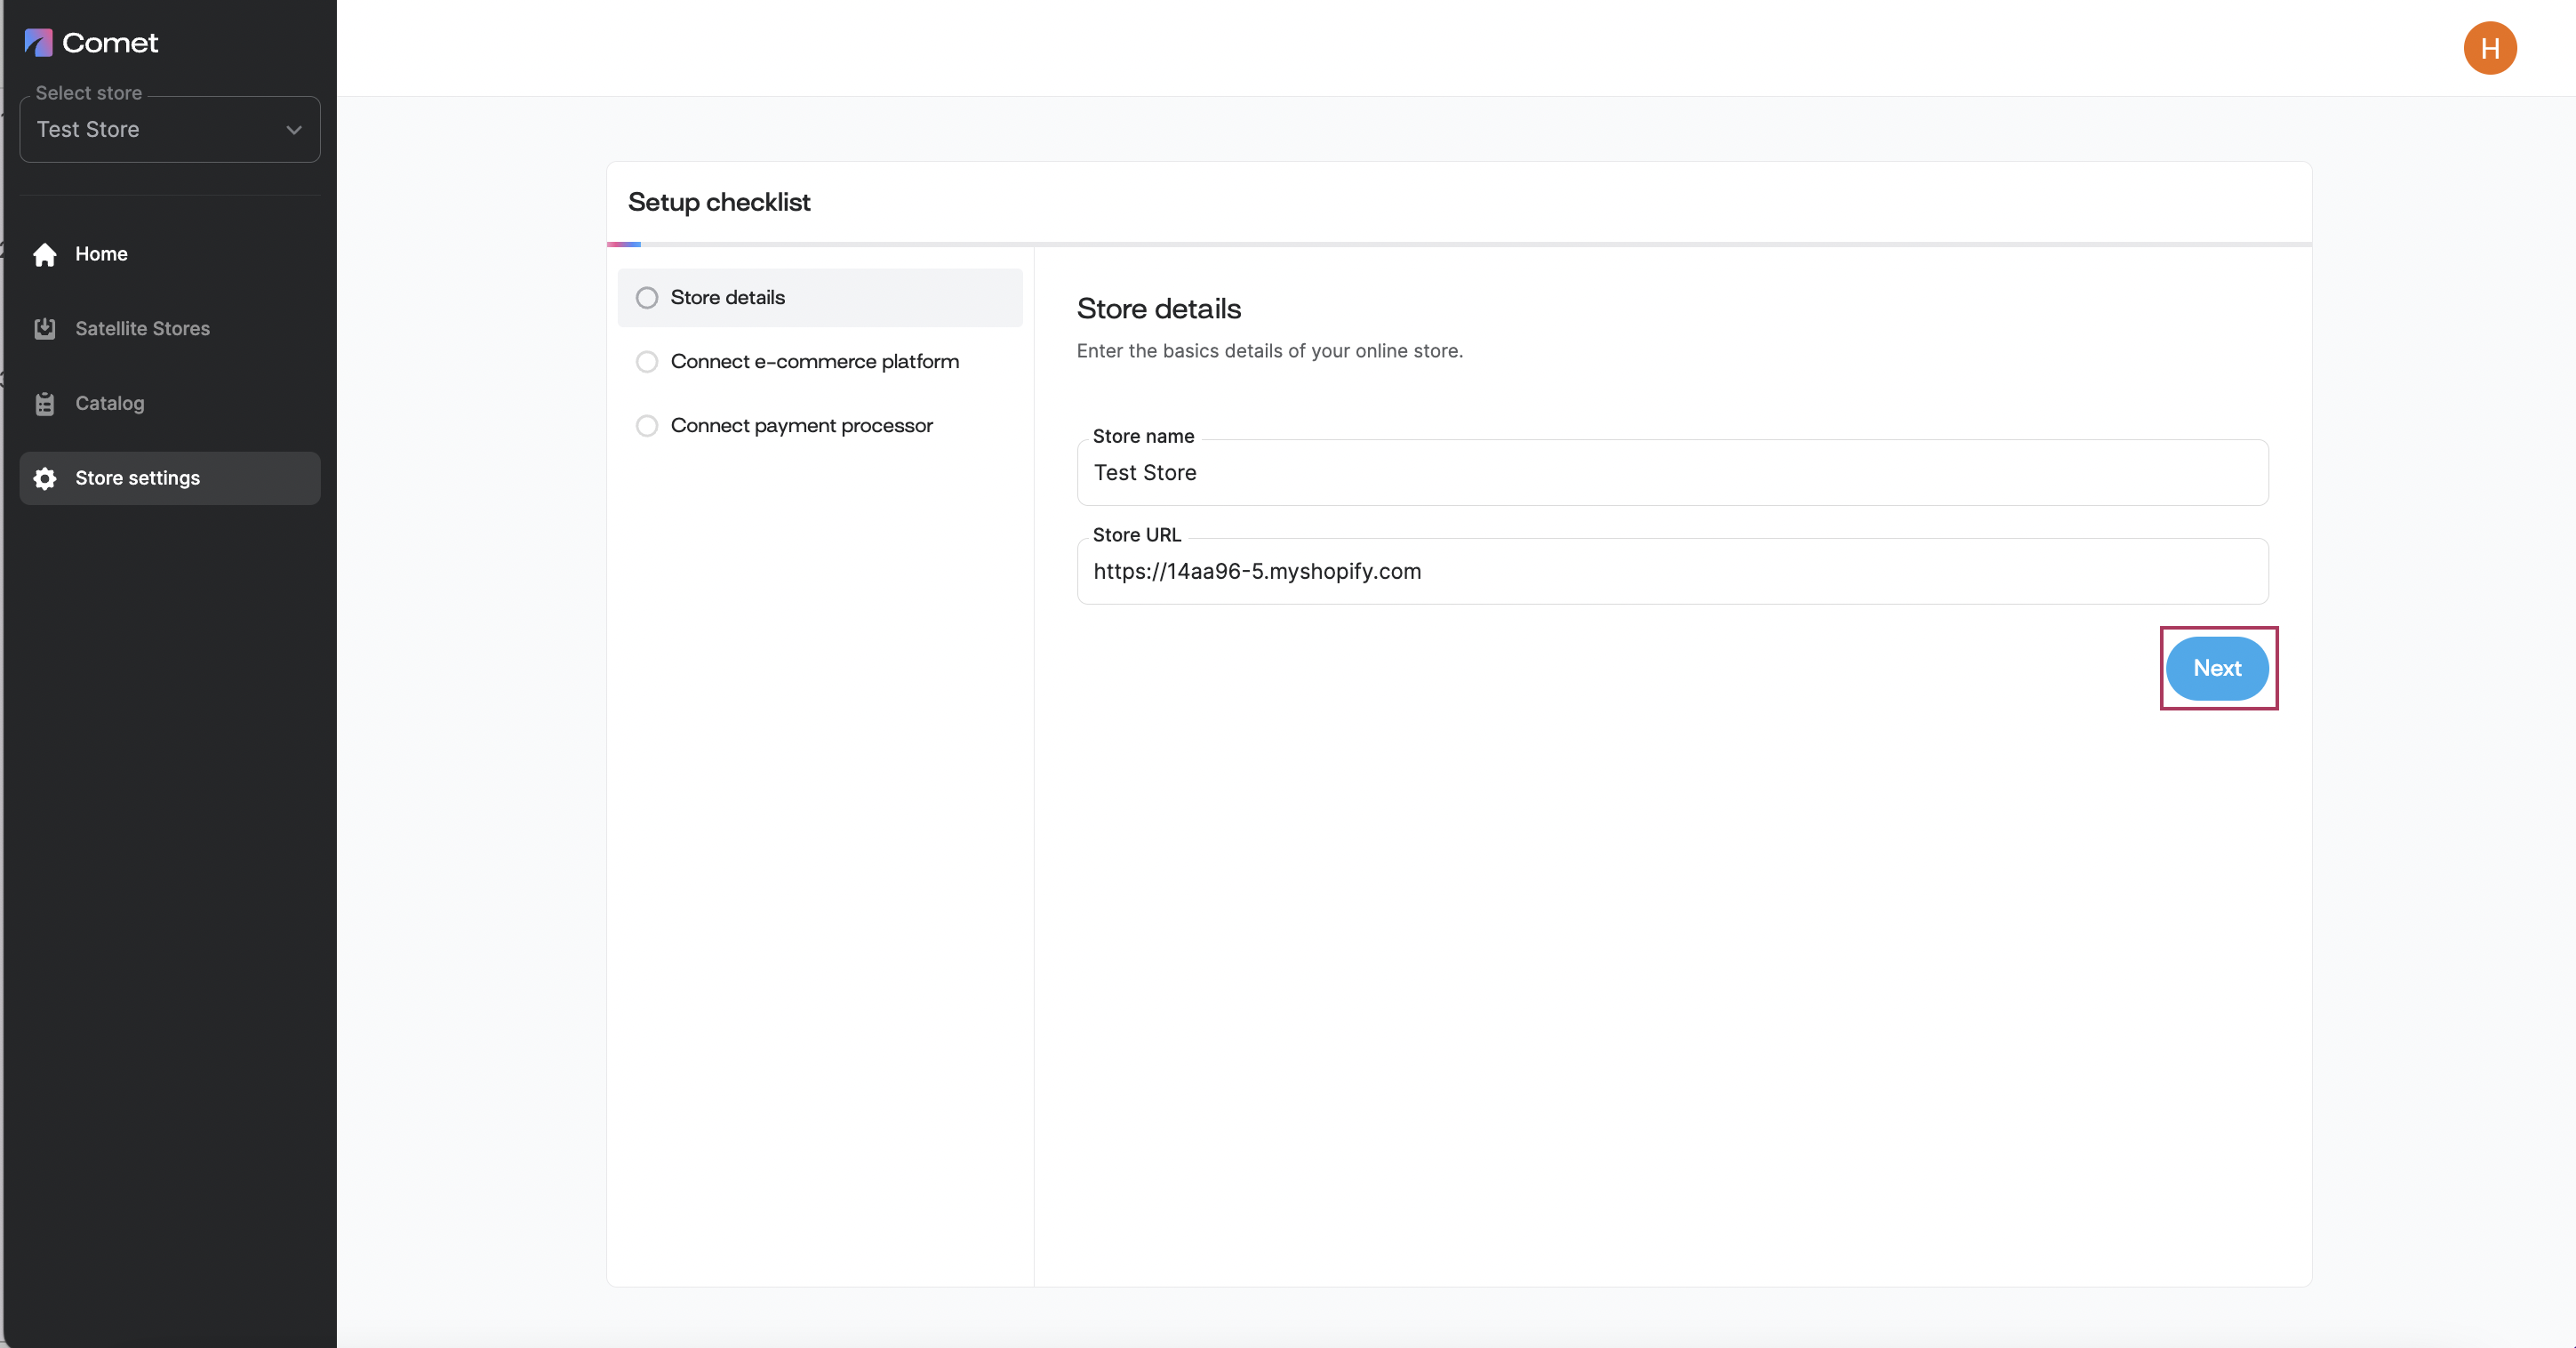
Add your store name
Add the store URL e.g., the URL of your Shopify store
Click next
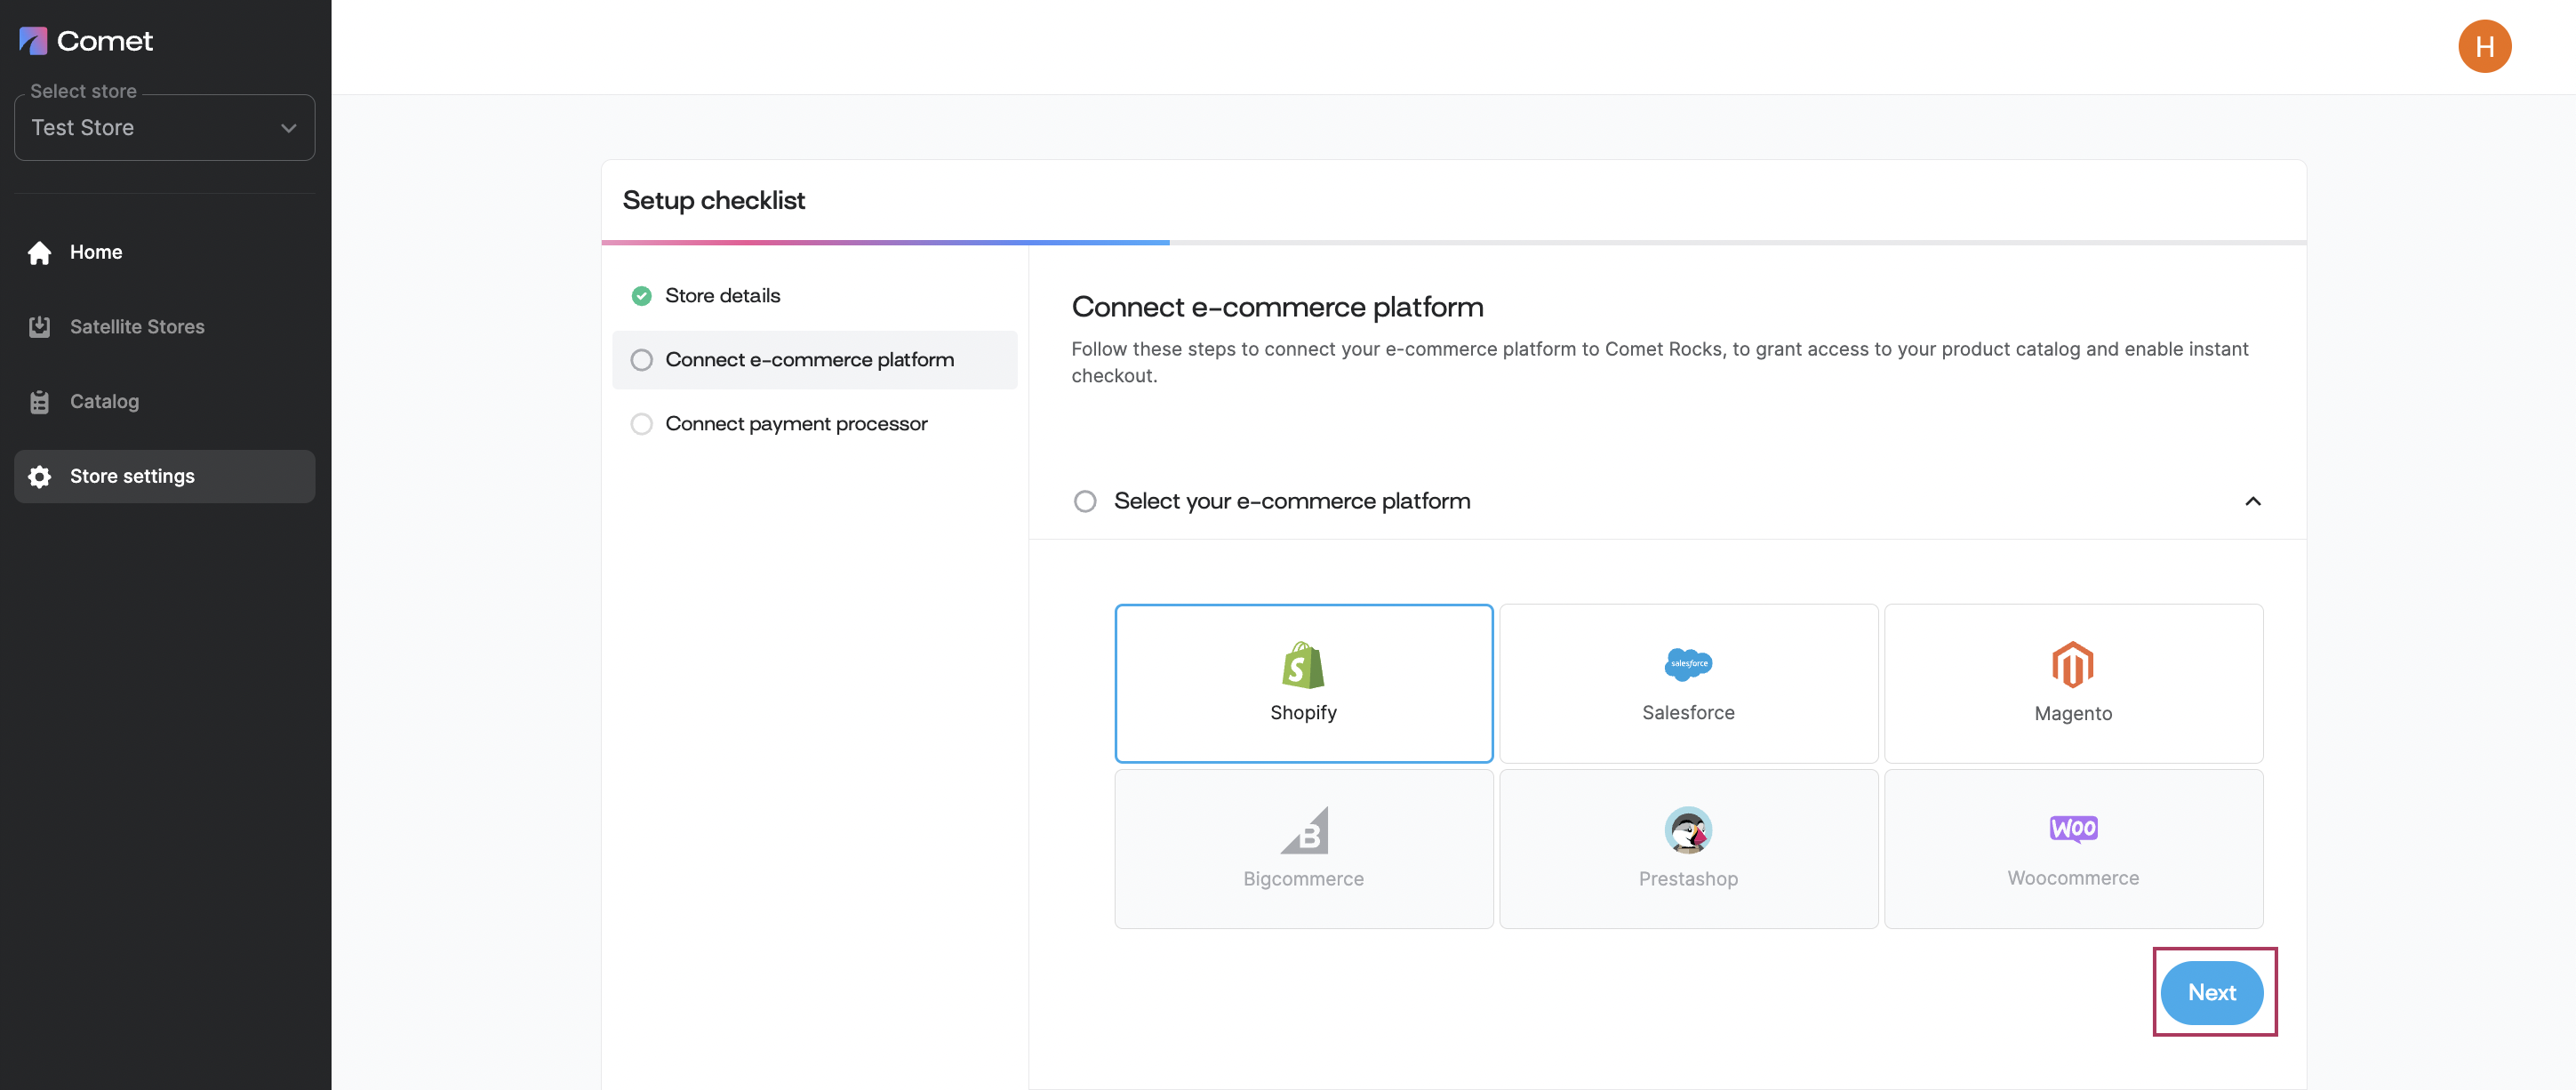
Connect e-commerce platformSelect Shopify as your e-commerce platform and click next
2. Create a custom app in Shopify
Next, switch to your Shopify store admin console, where you will create a custom app and generate API credentials. To connect your store with Shopify, you will need to create an app with Shopify Admin API and Salesfront API permissions.
2.1. Create the custom app
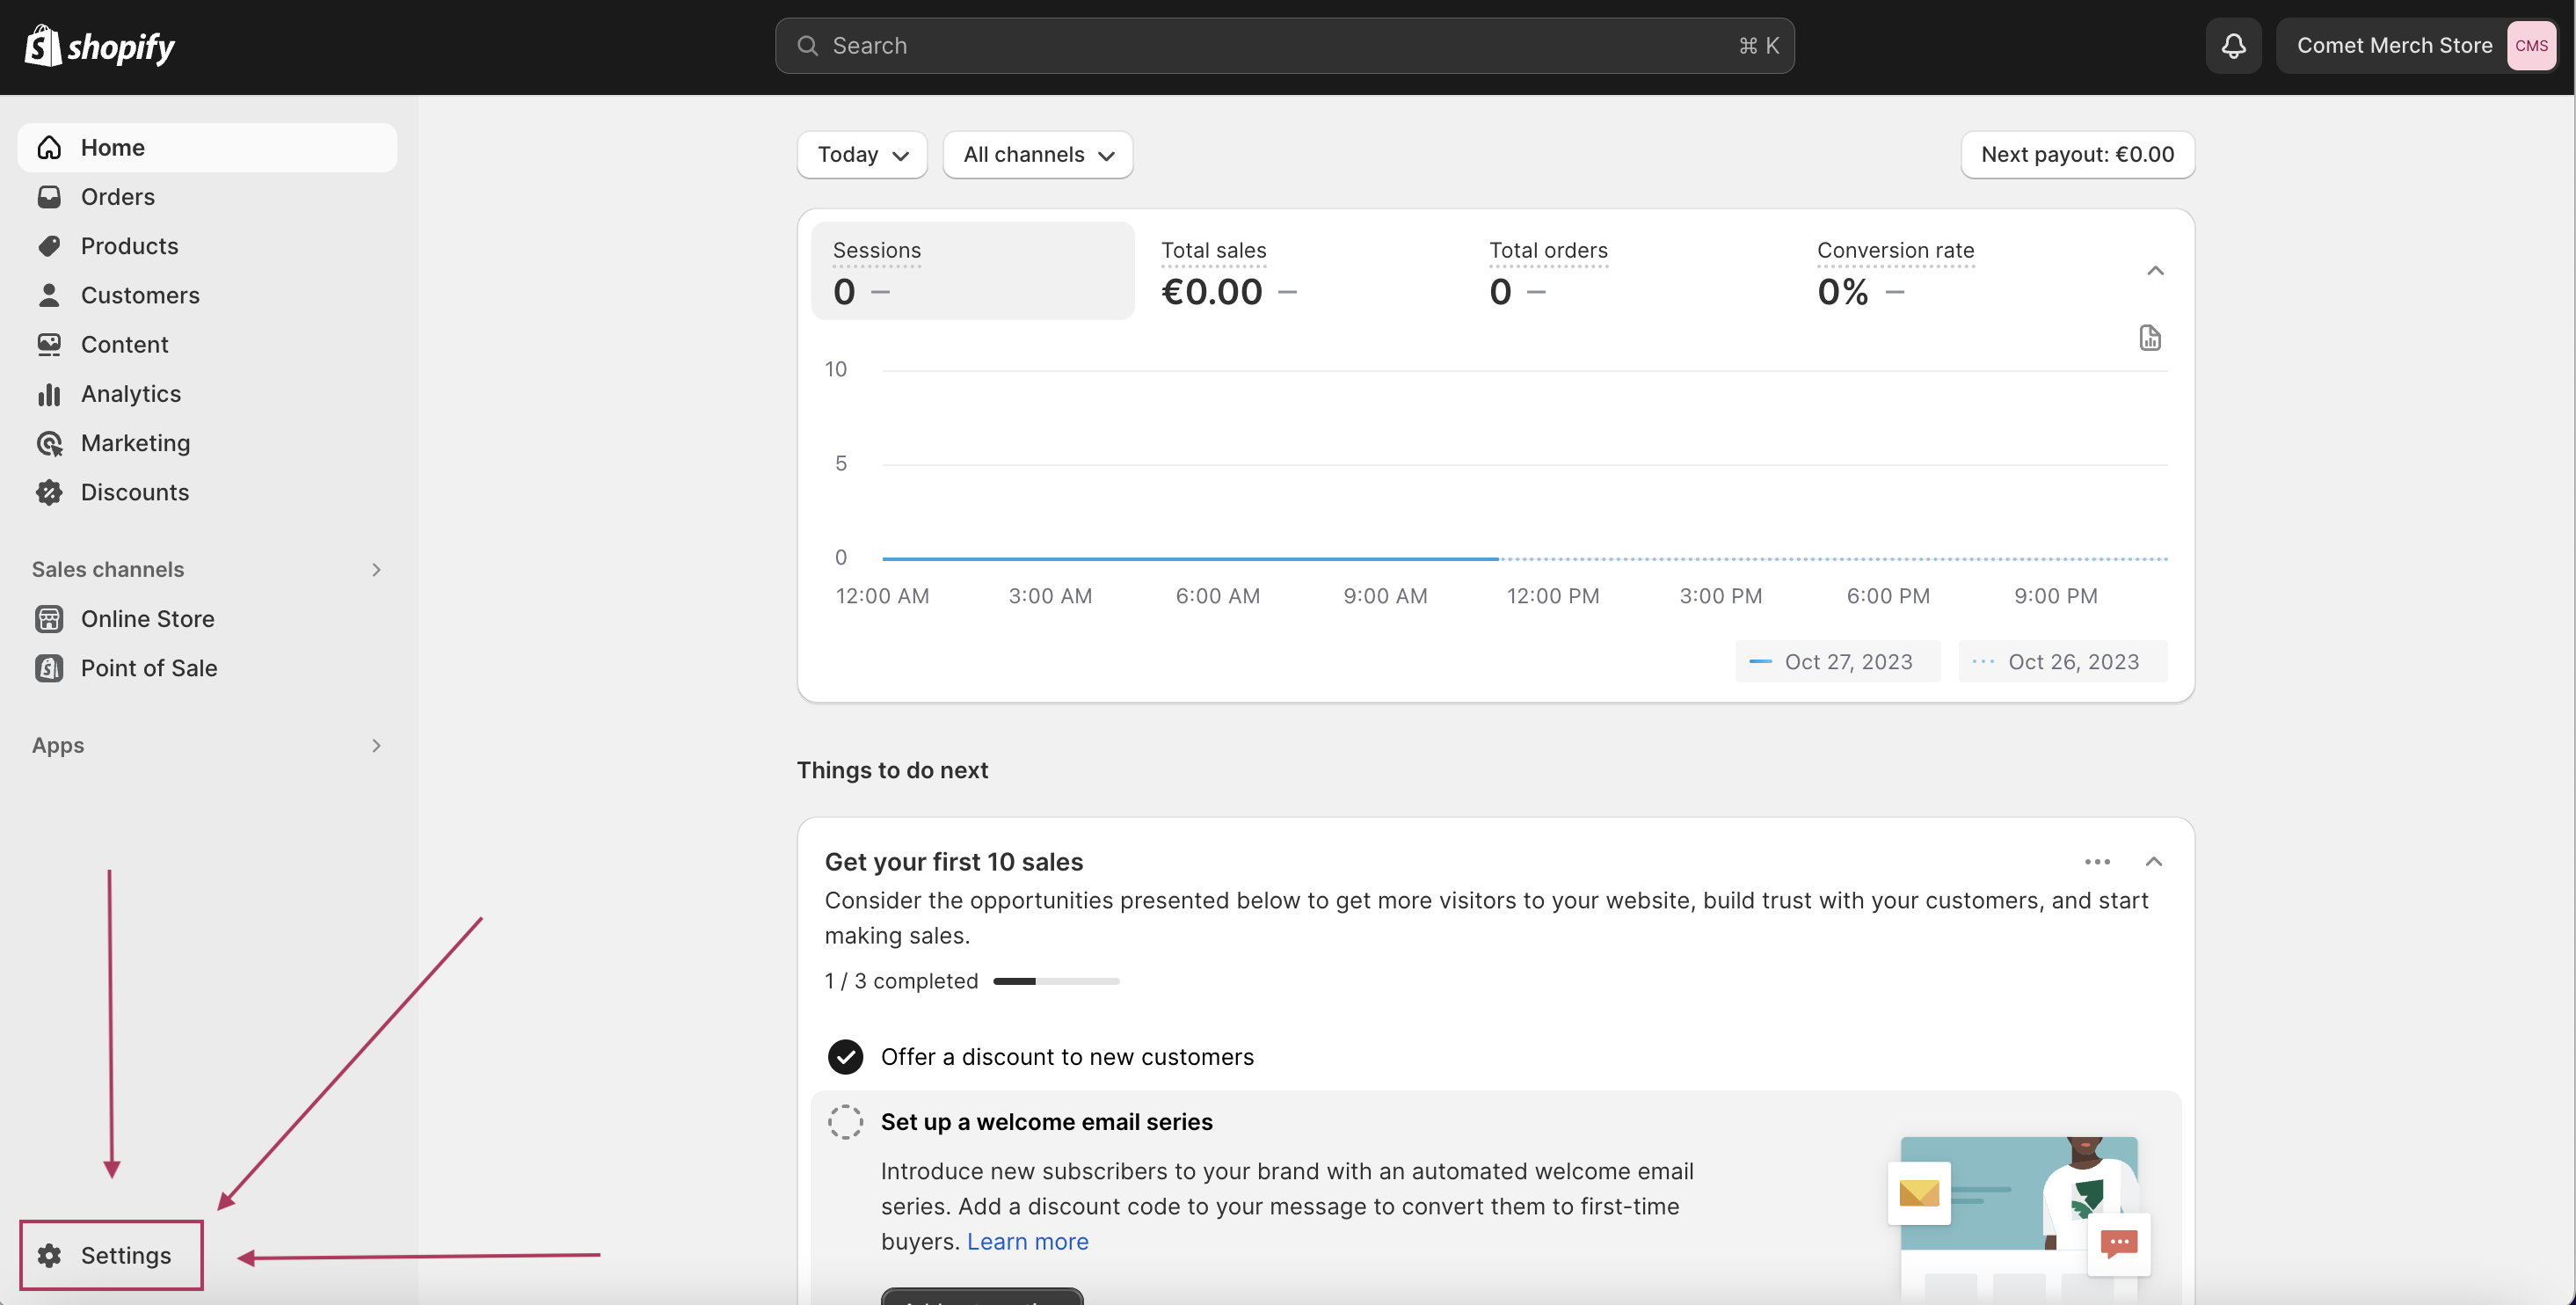
From your Shopify main dashboard, navigate to → Settings
From Settings, navigate to → Apps and sales channels
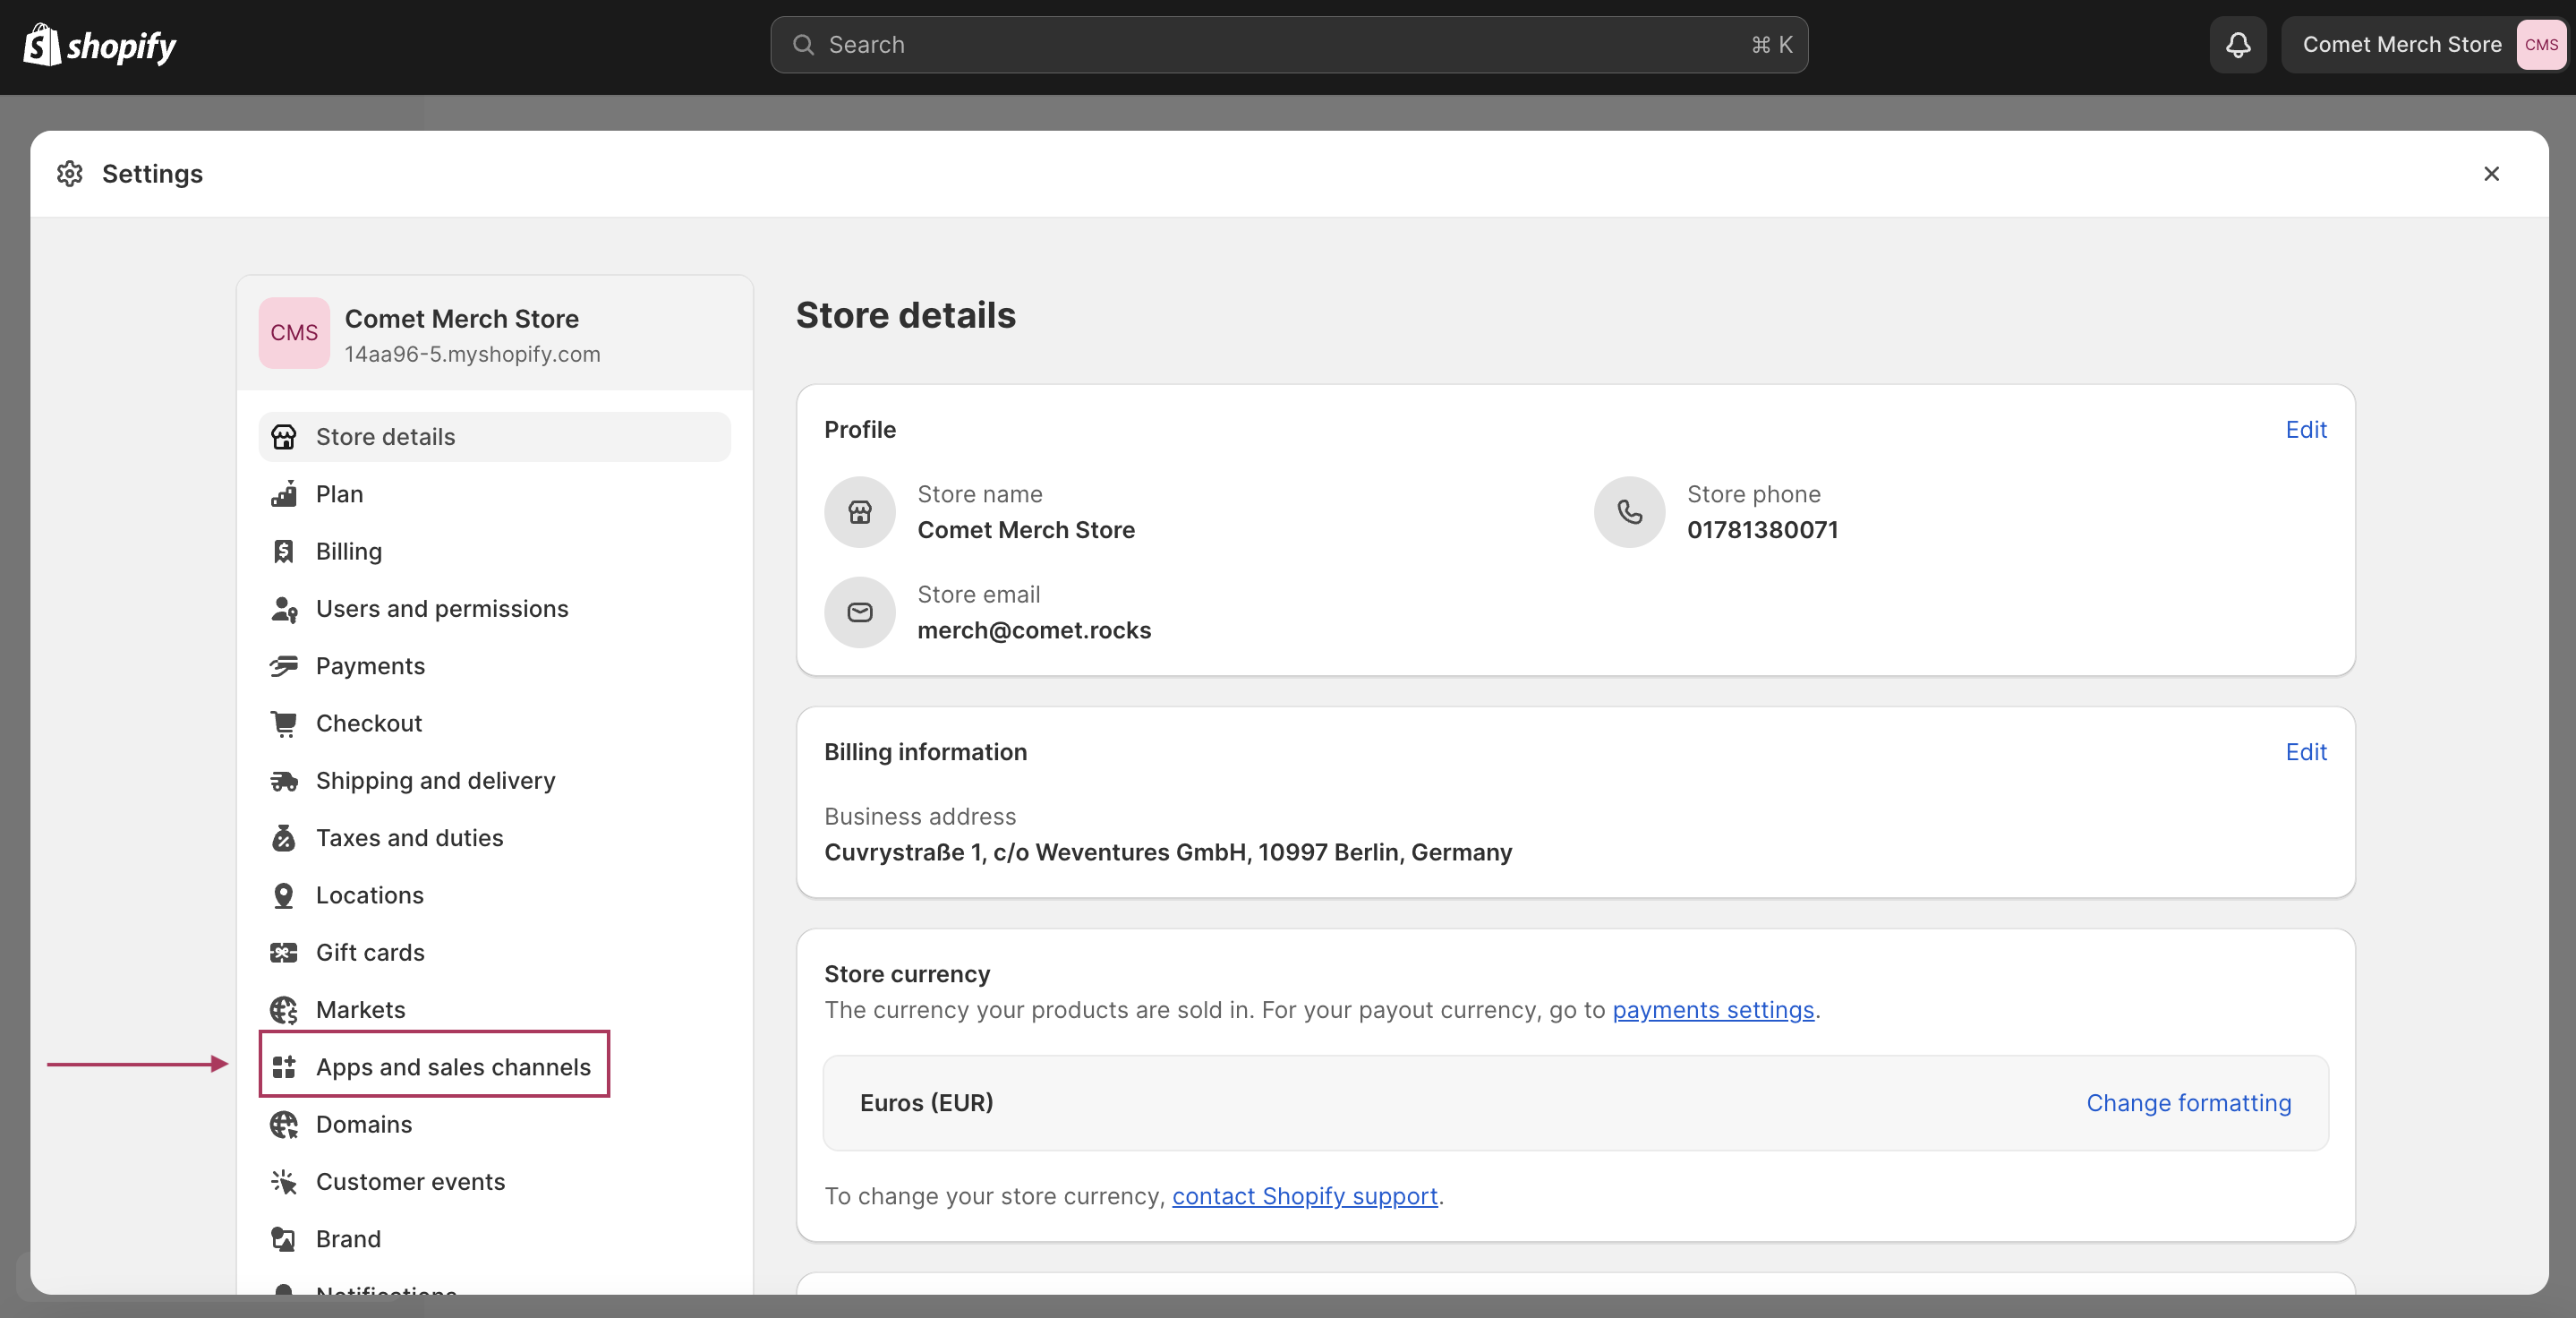
Navigate to → Develop Apps
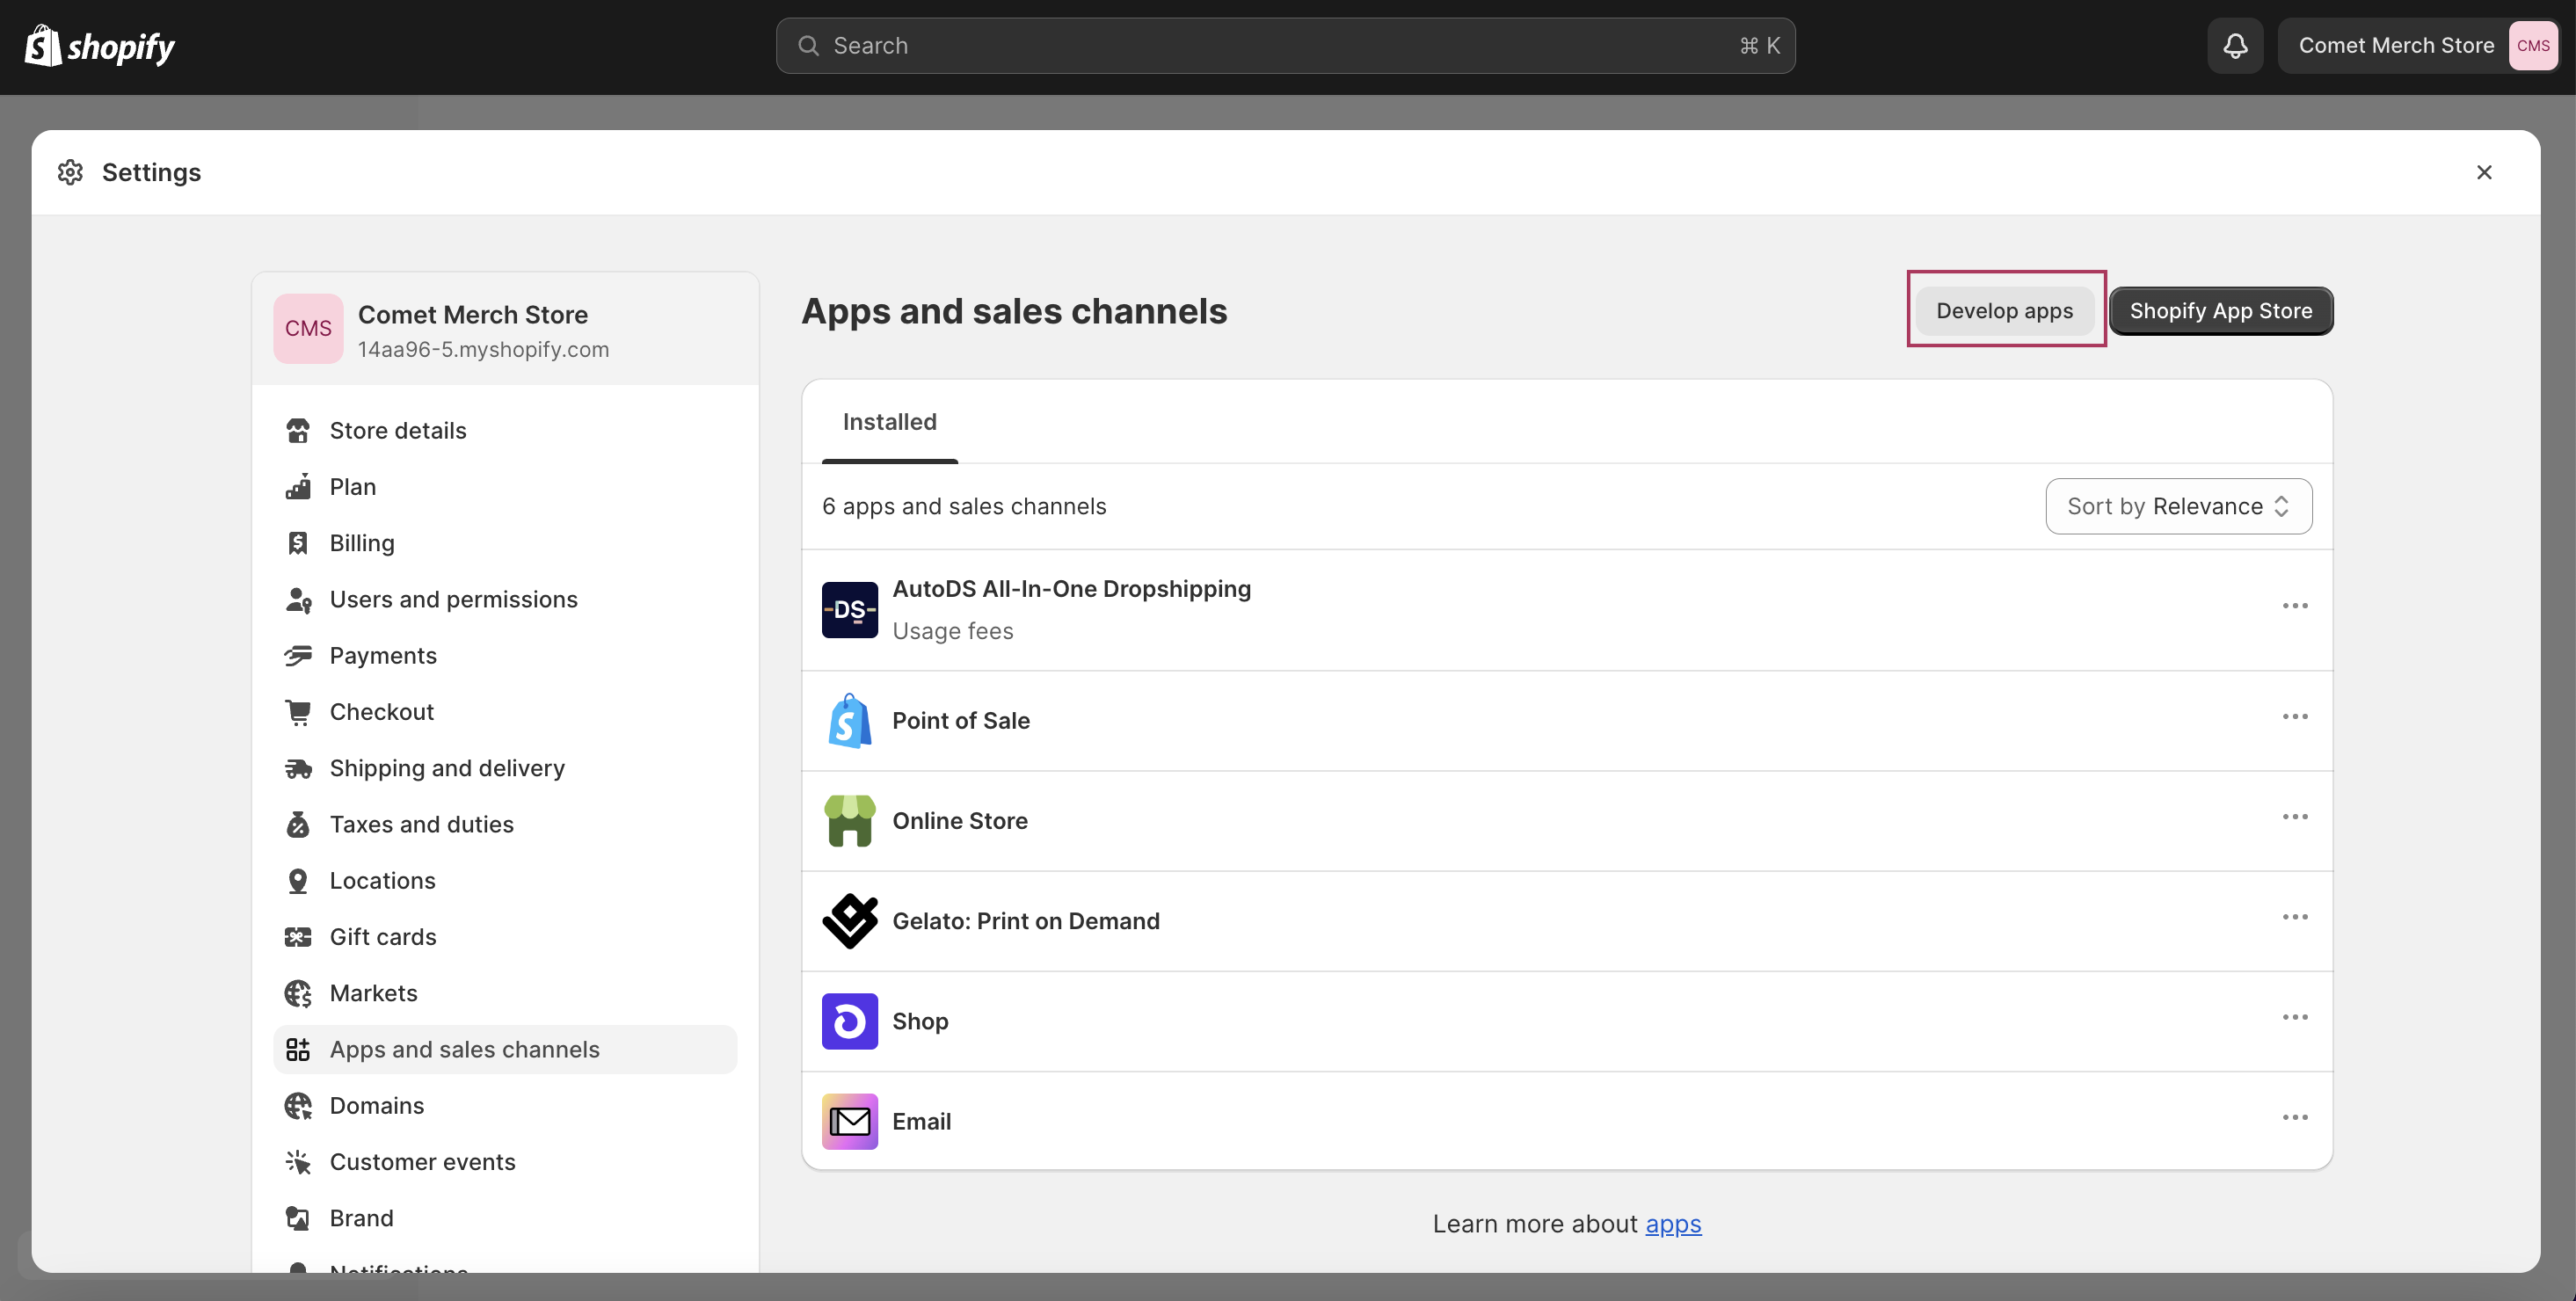
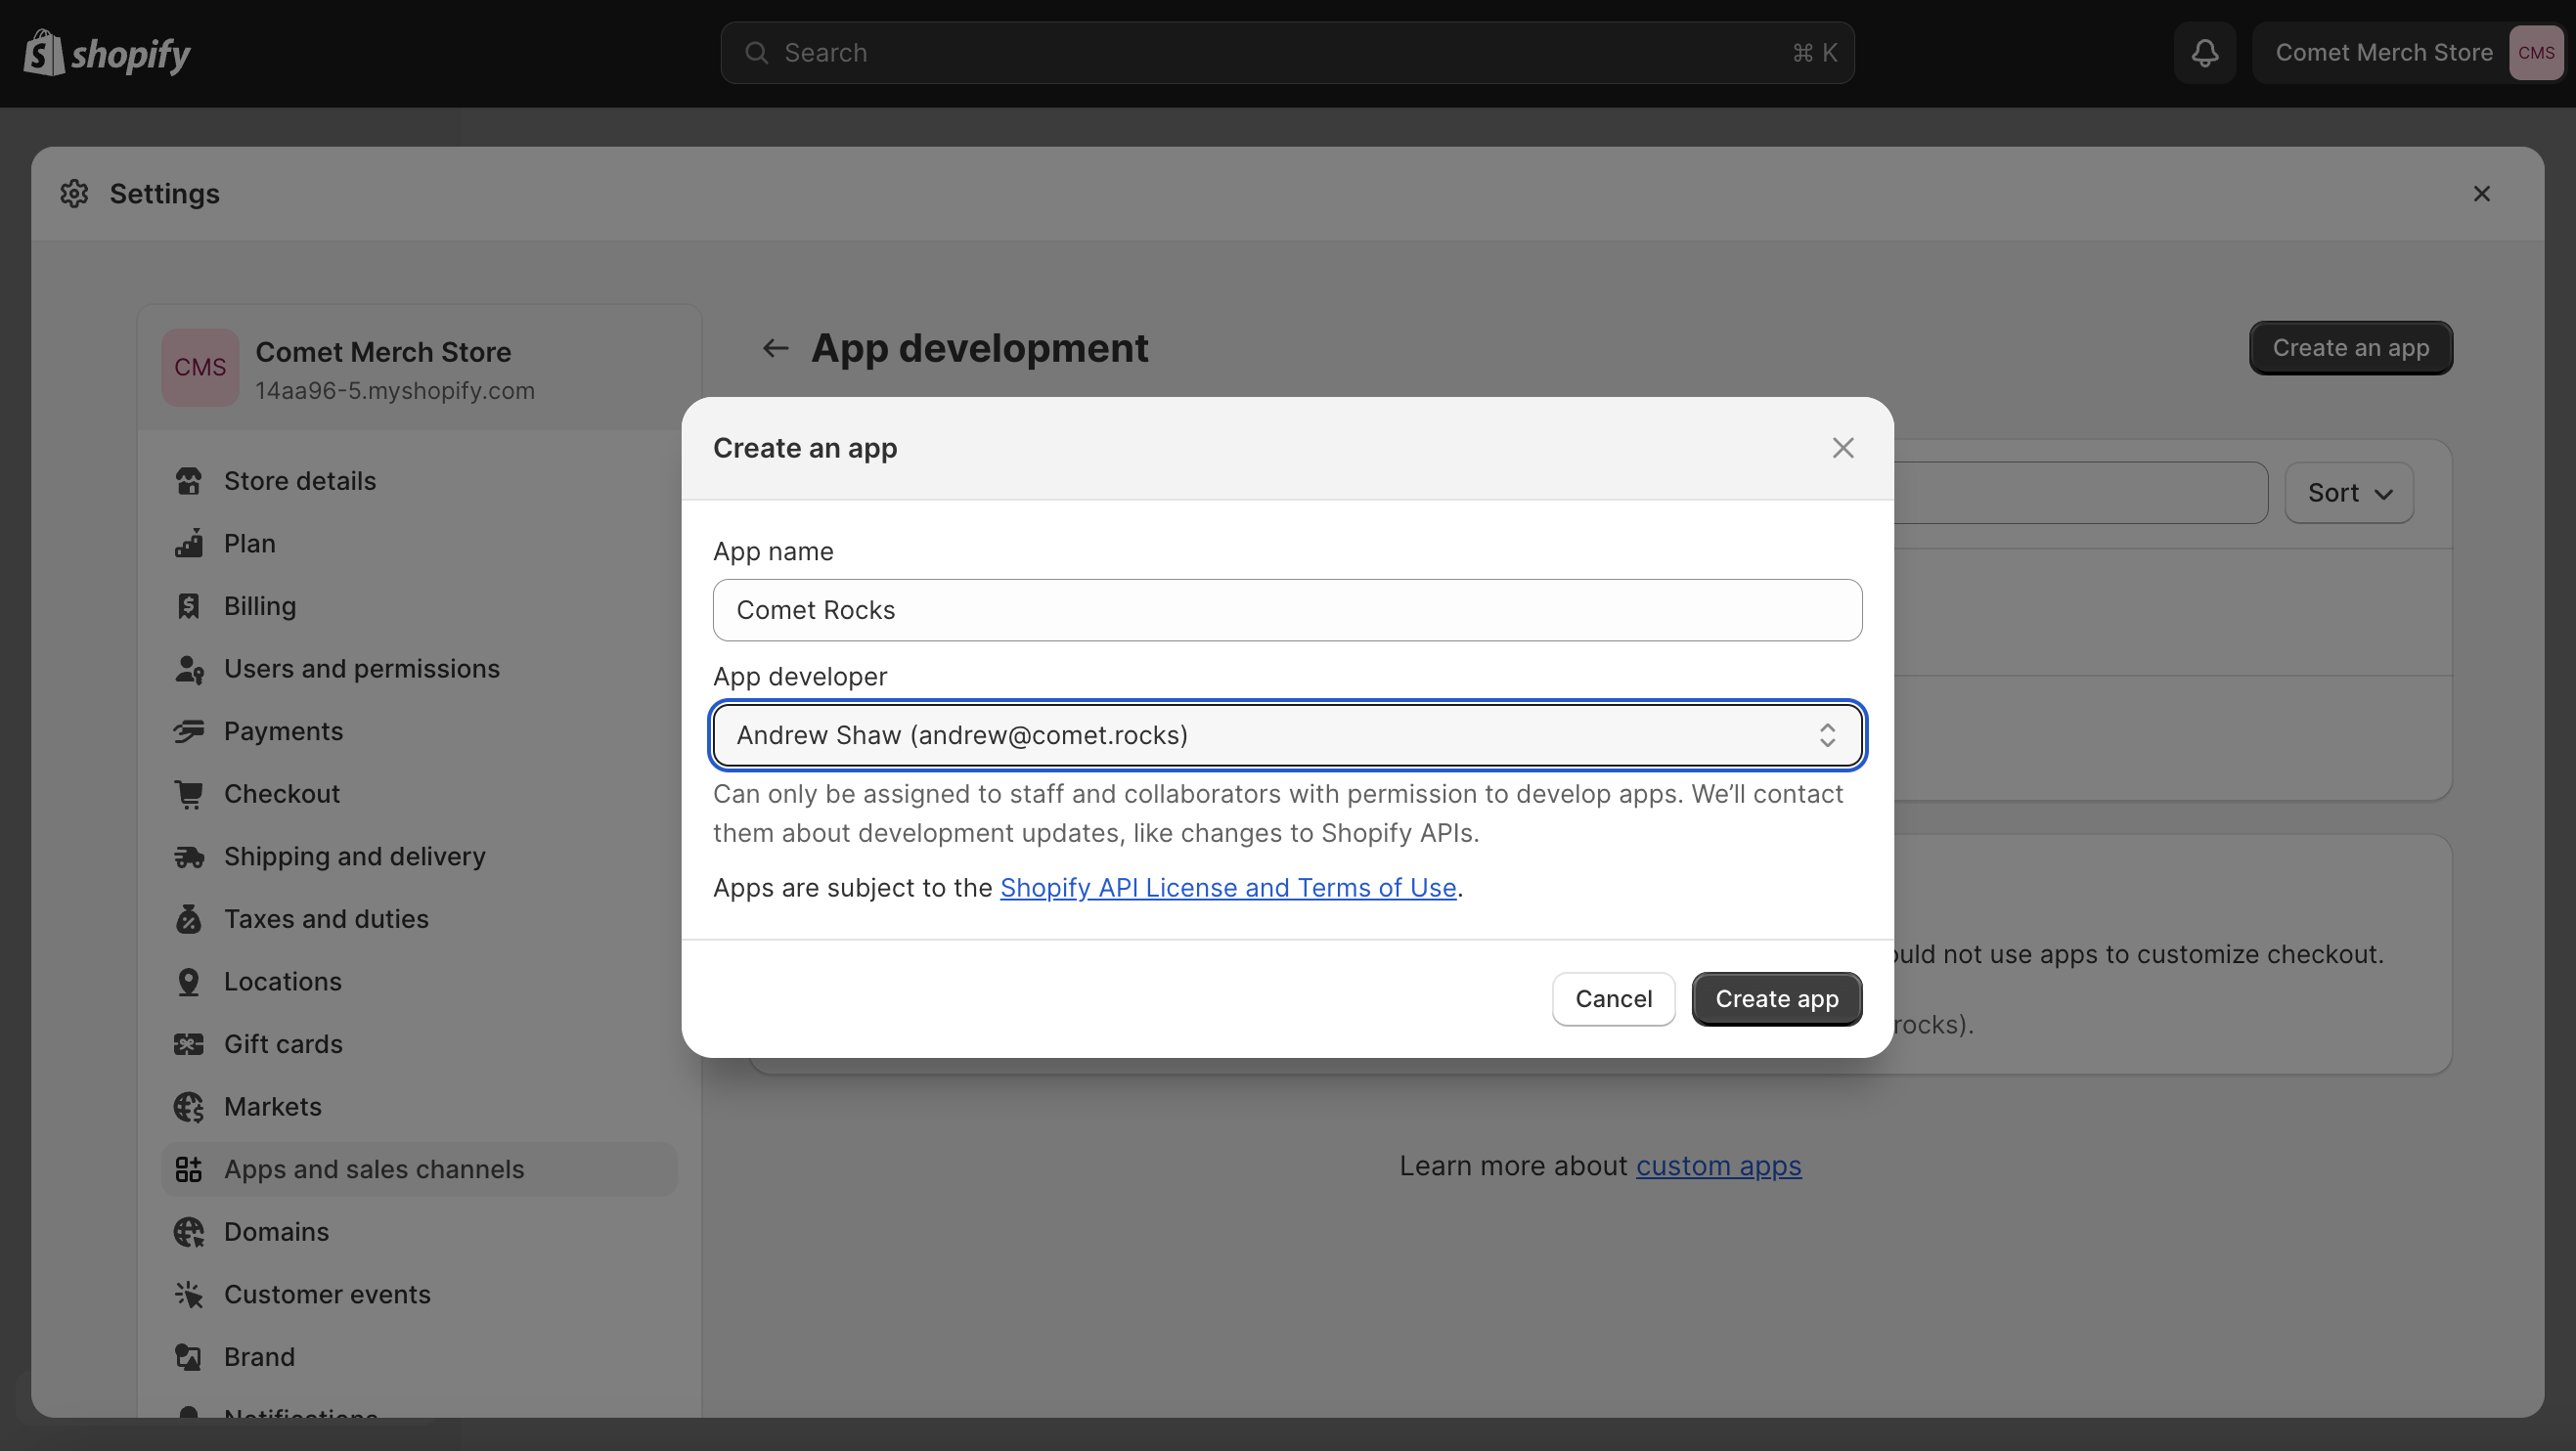
Click Create an app
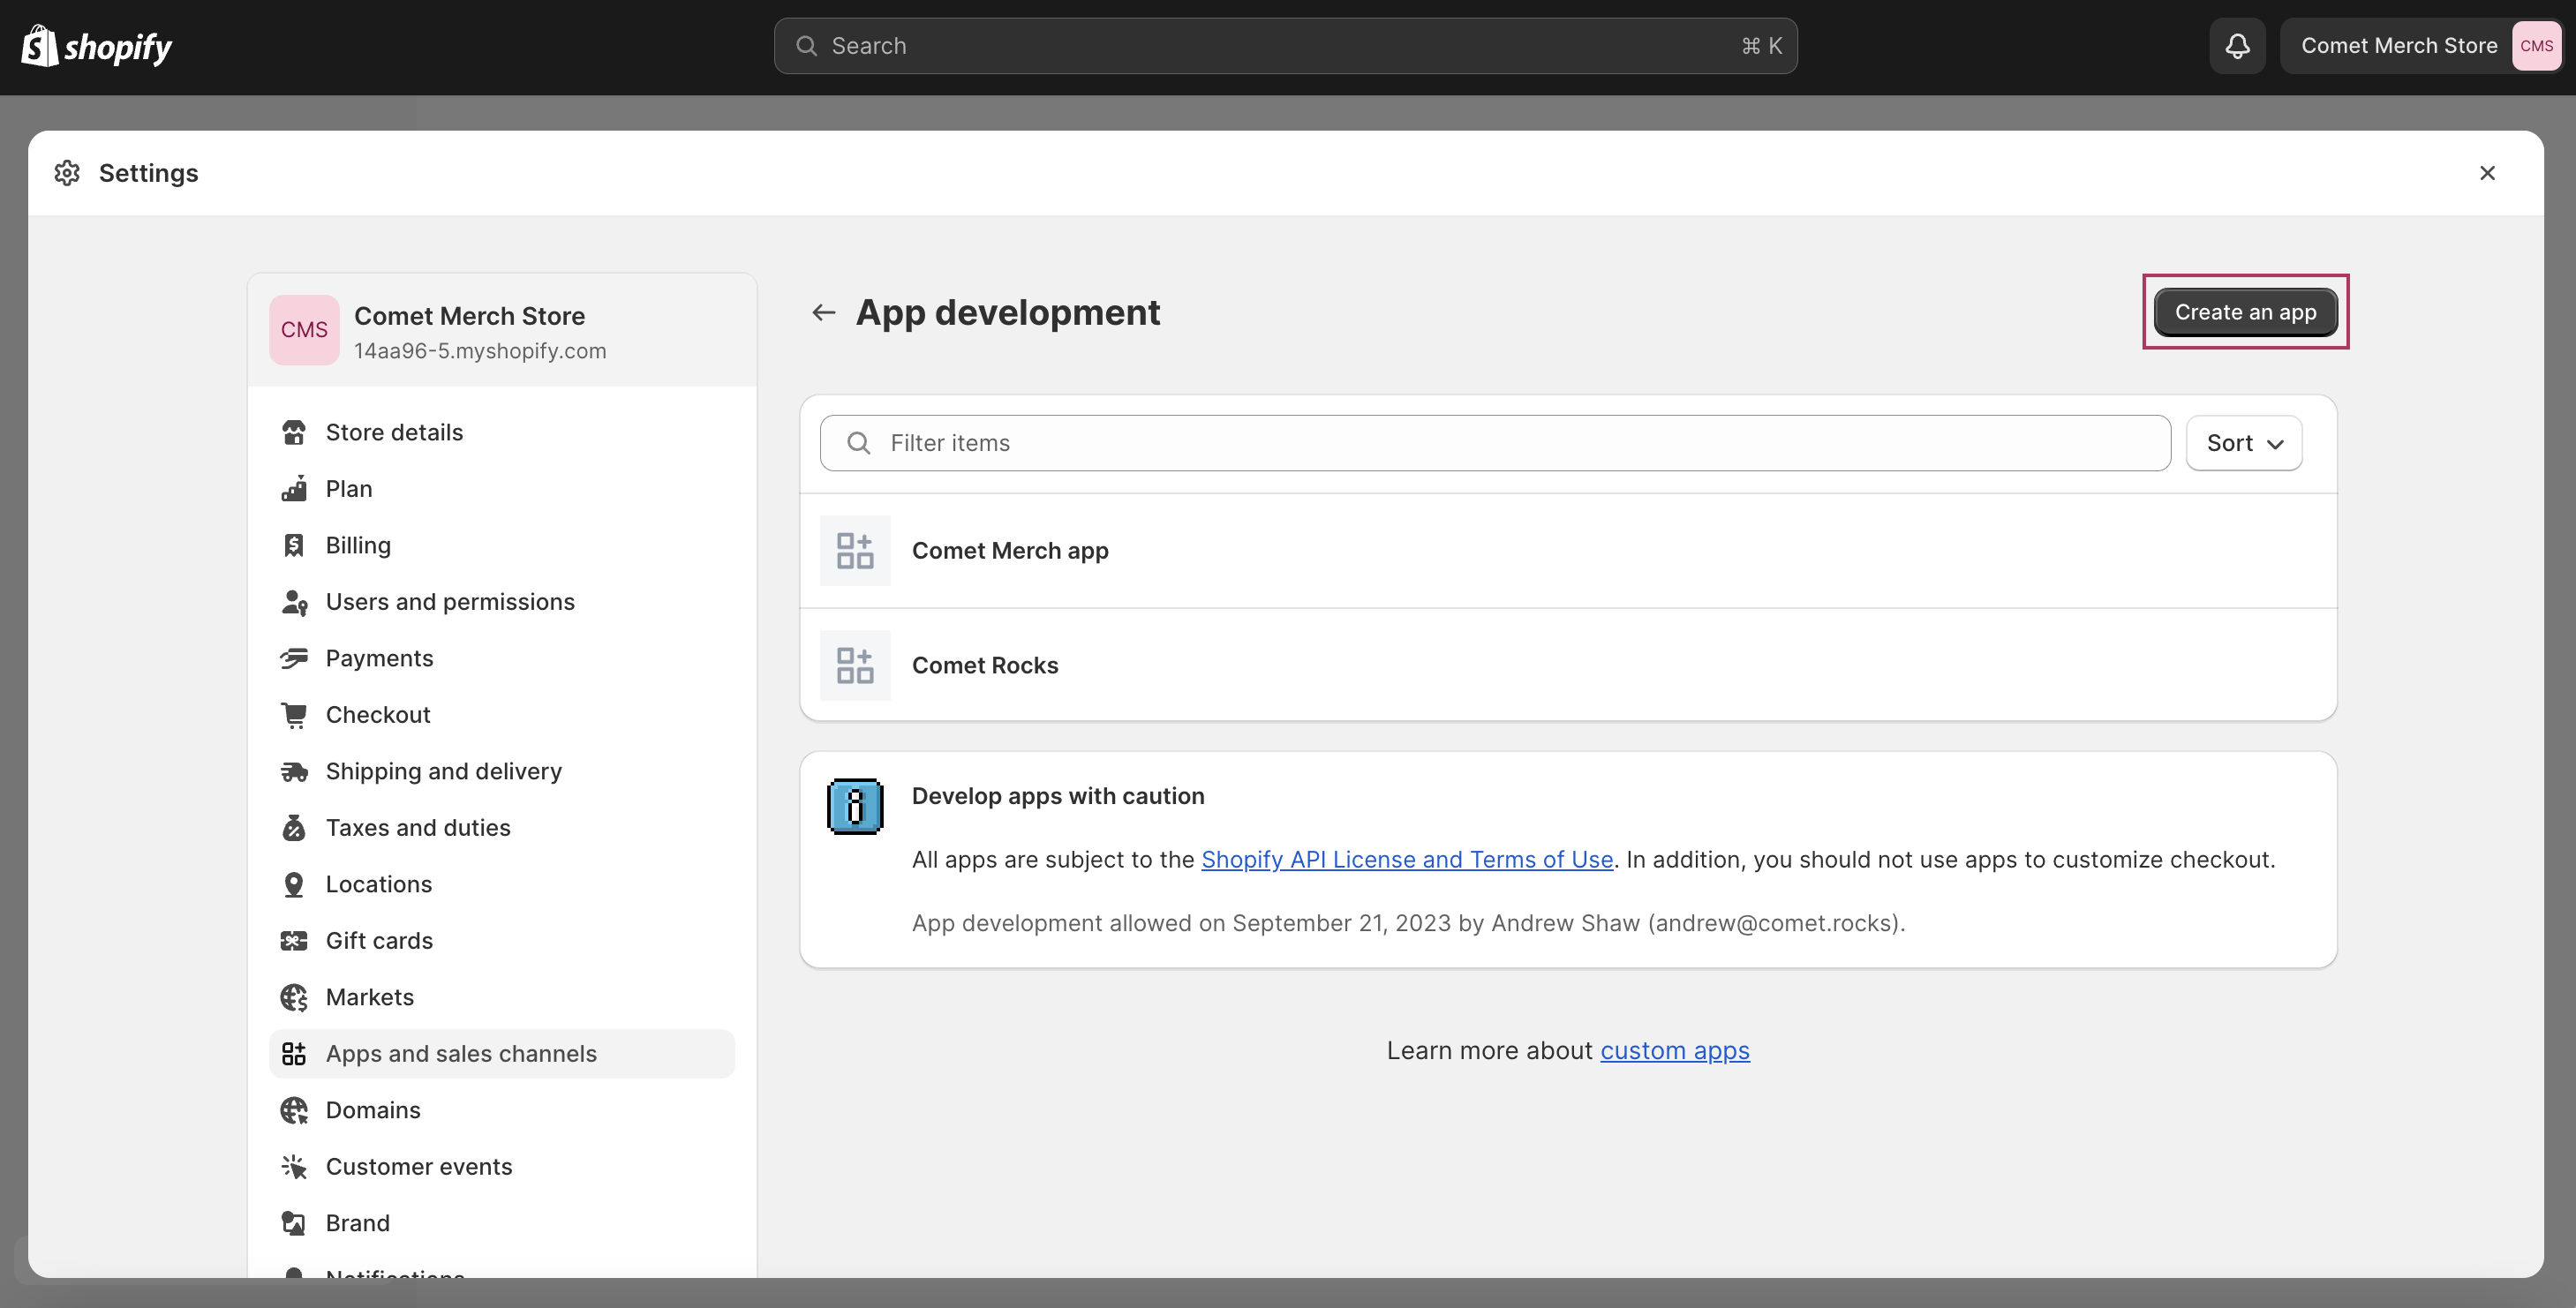
In the modal that appears, enter an app name (ex. “Comet Rocks”) and select the user in your system who should be the owner of this app. Typically, this is the default selected user.
2.2. Configure Admin API access scopes
Next, we will configure the Admin API access scopes of the custom app.
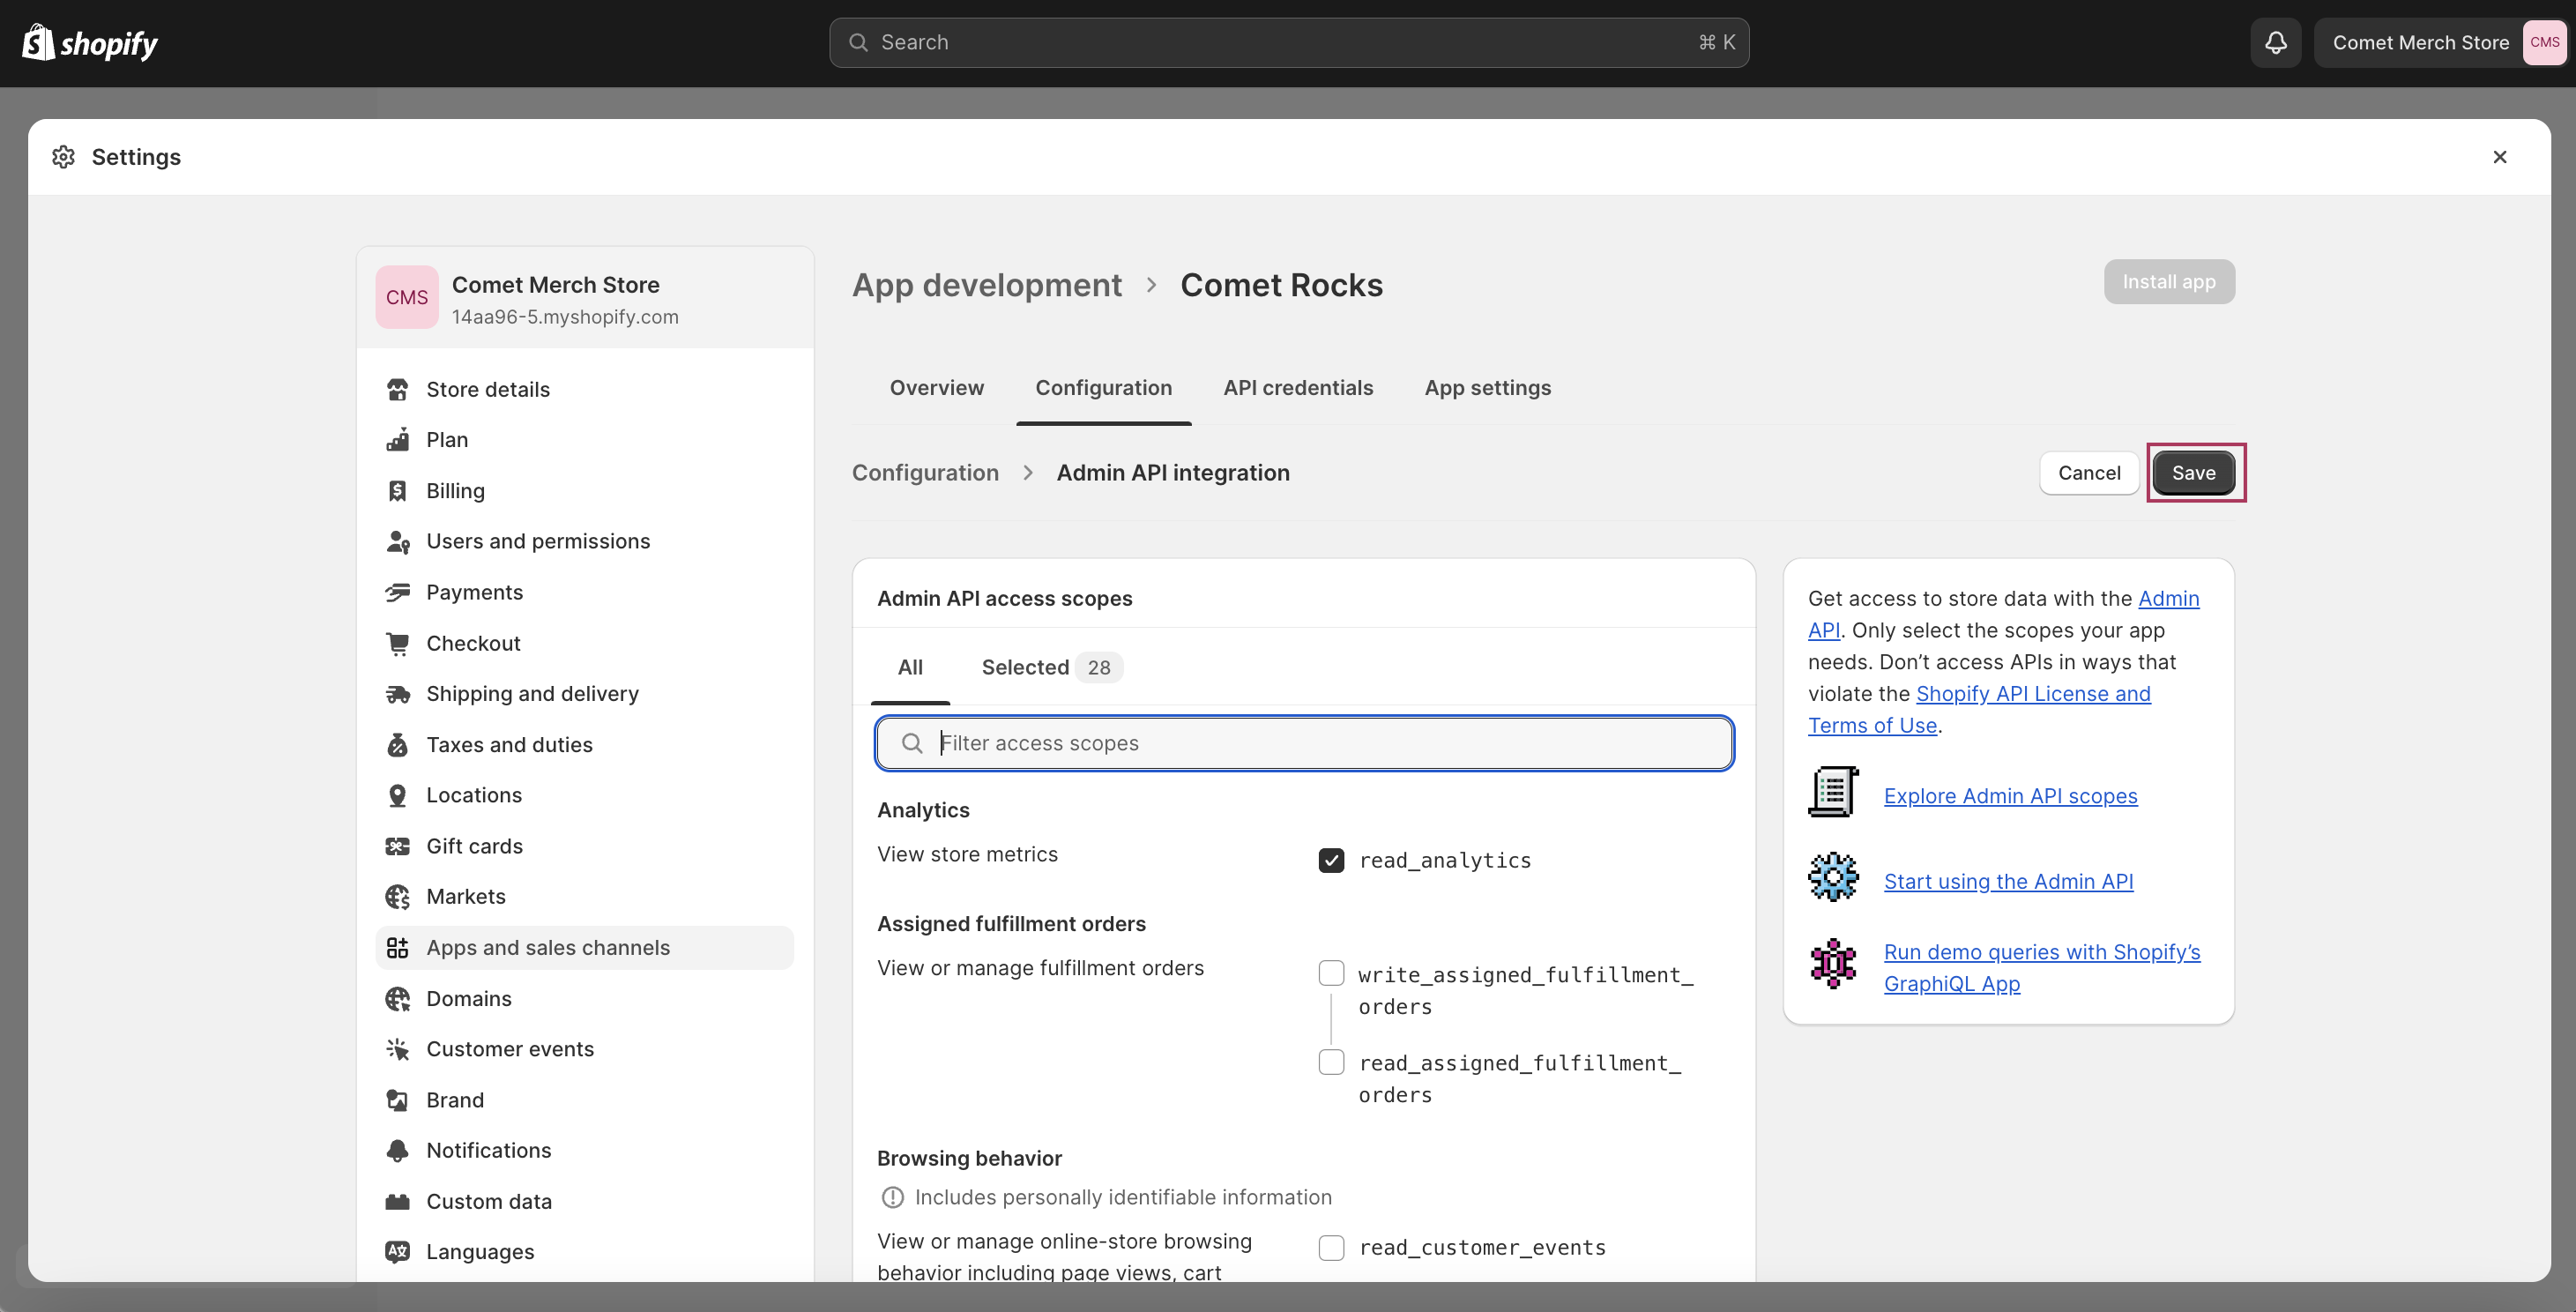
In your app development settings, navigate to the Configuration tab, find the Admin API integration section and click Configure.

Next, go to Admin API access scopes and select the required scopes.Here look for the list of keywords listed below to validate the relevant necessary scopes - see example screenshot for “Product”:
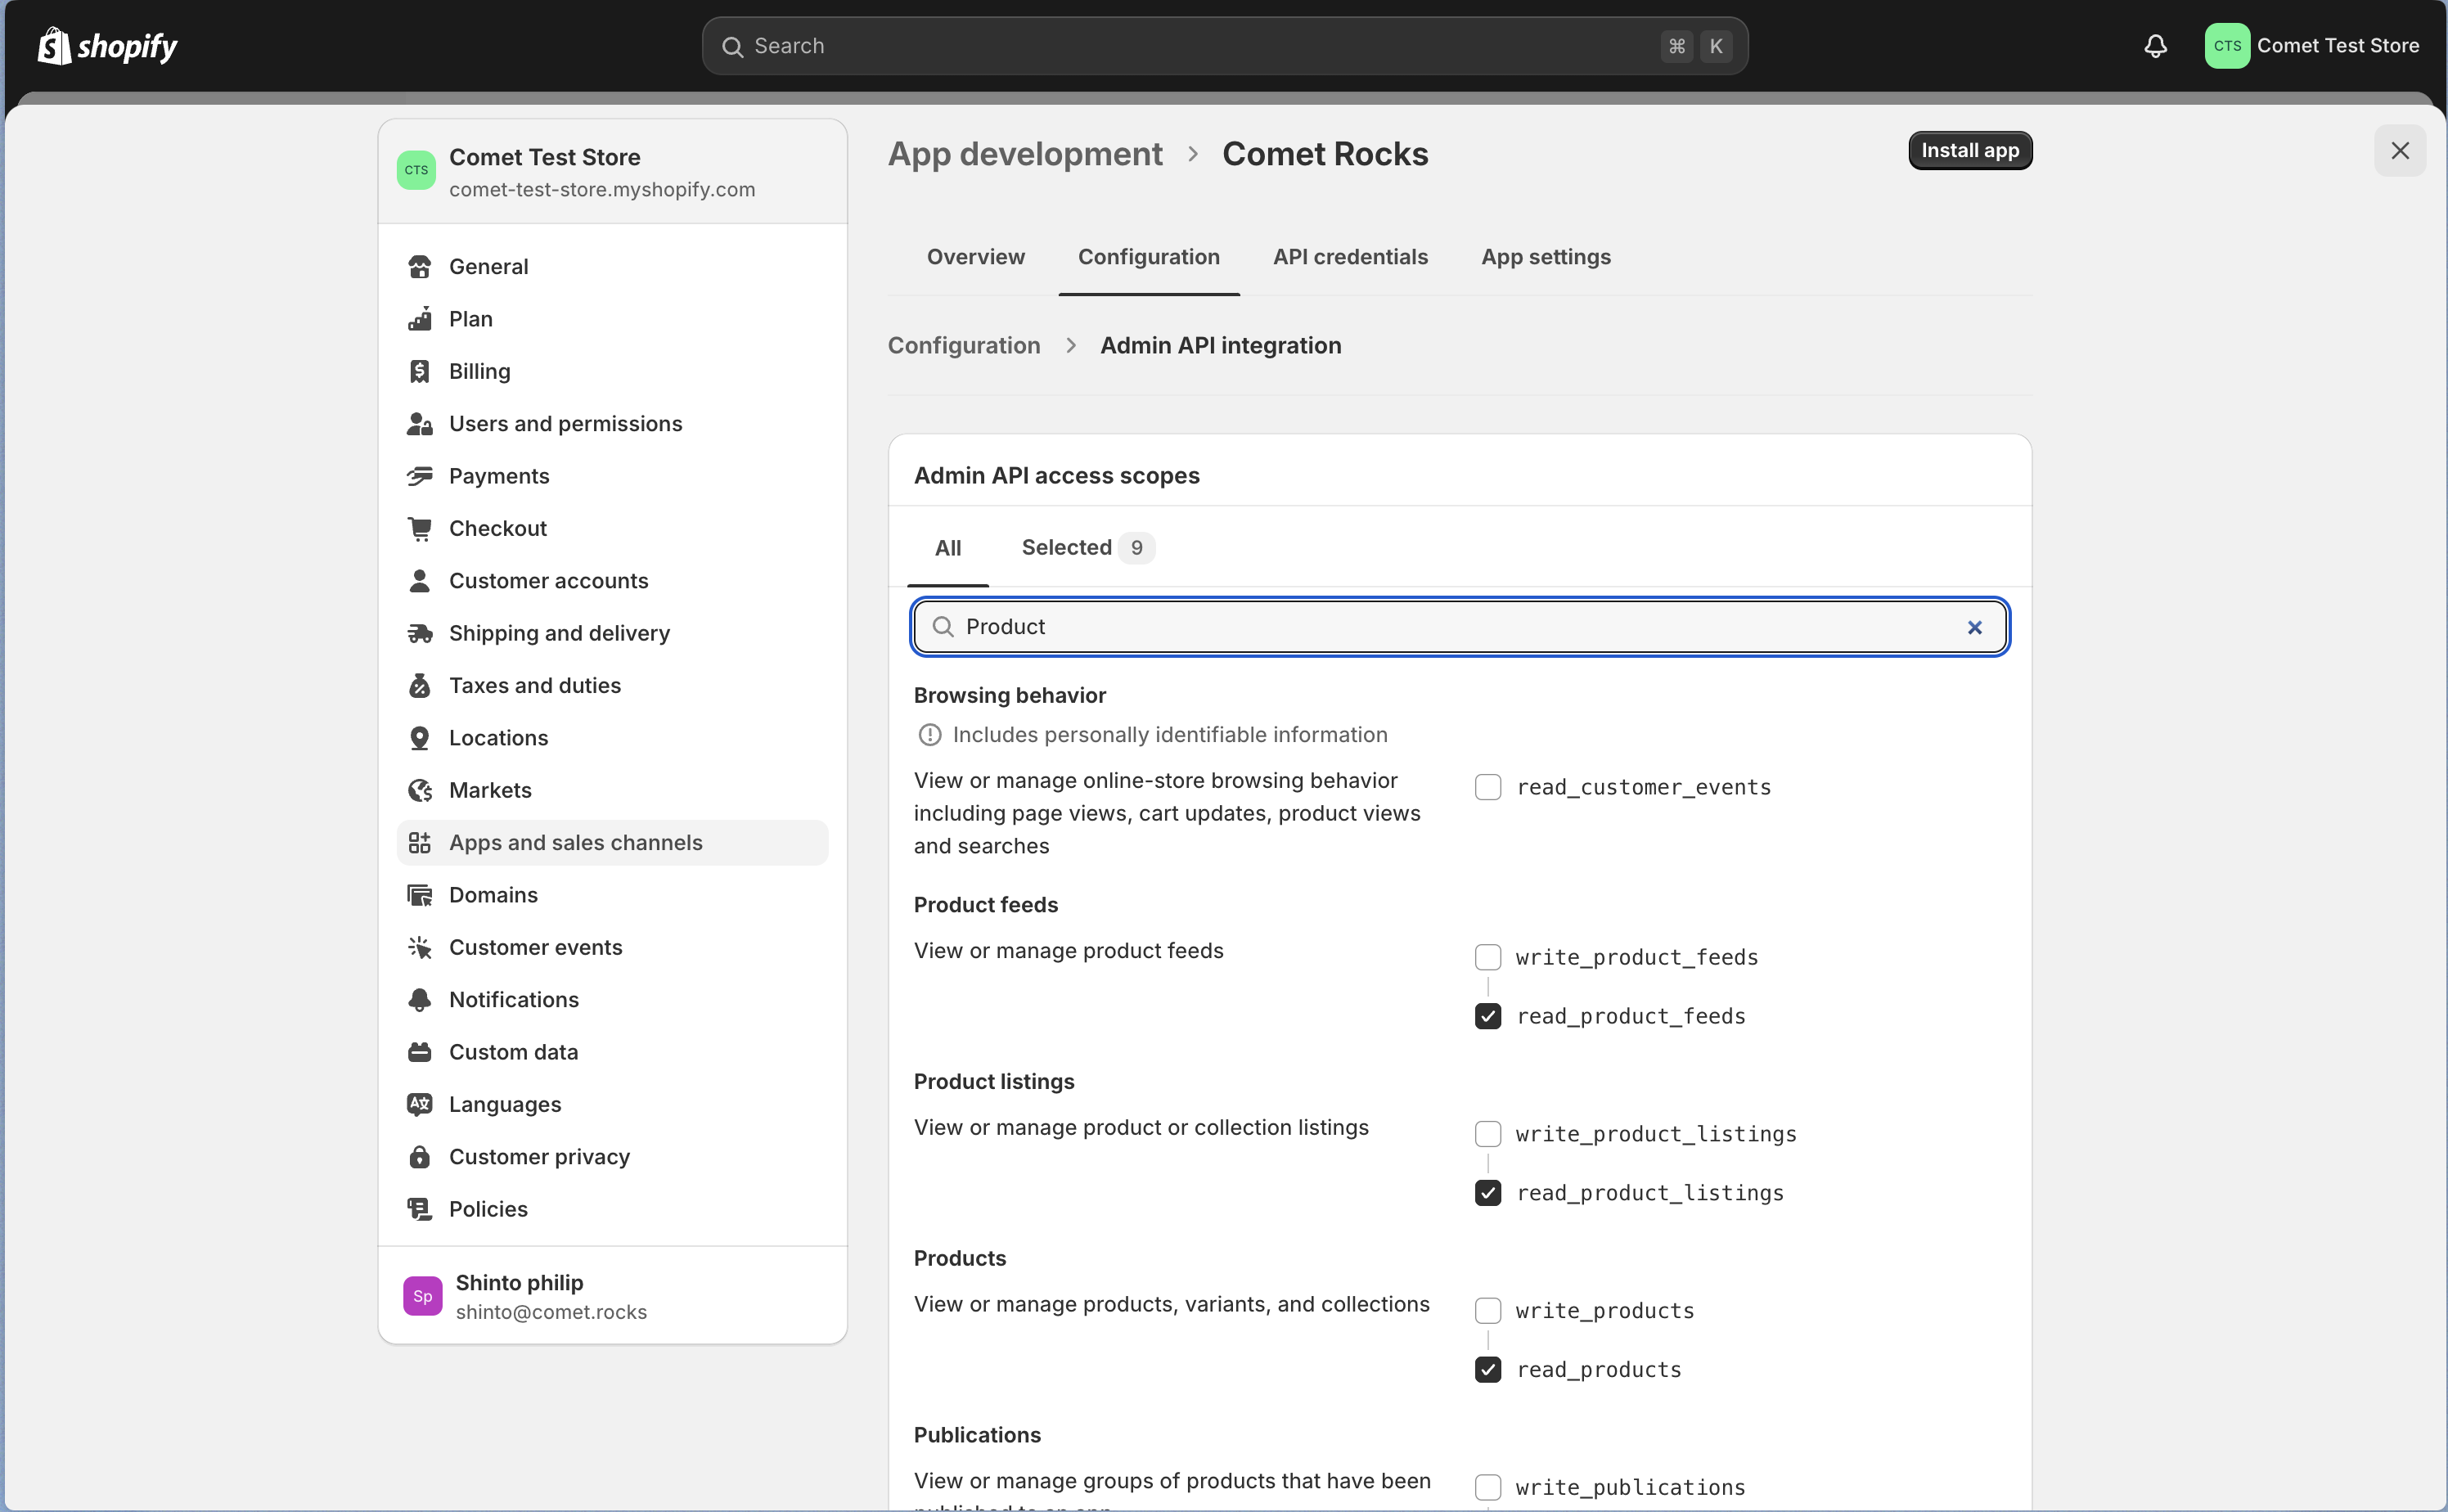 To successfully connect Comet to your Shopify store, find and select the following 7 access scopes:
Discounts:
read_discounts,read_customersInventory:
read_inventoryLocales:
read_localesOrders:
read_ordersPrice:
read_price_rulesProduct:
read_product_feeds,read_product_listings,read_productsTranslations:
read_translations
Once completed, click Save to apply changes
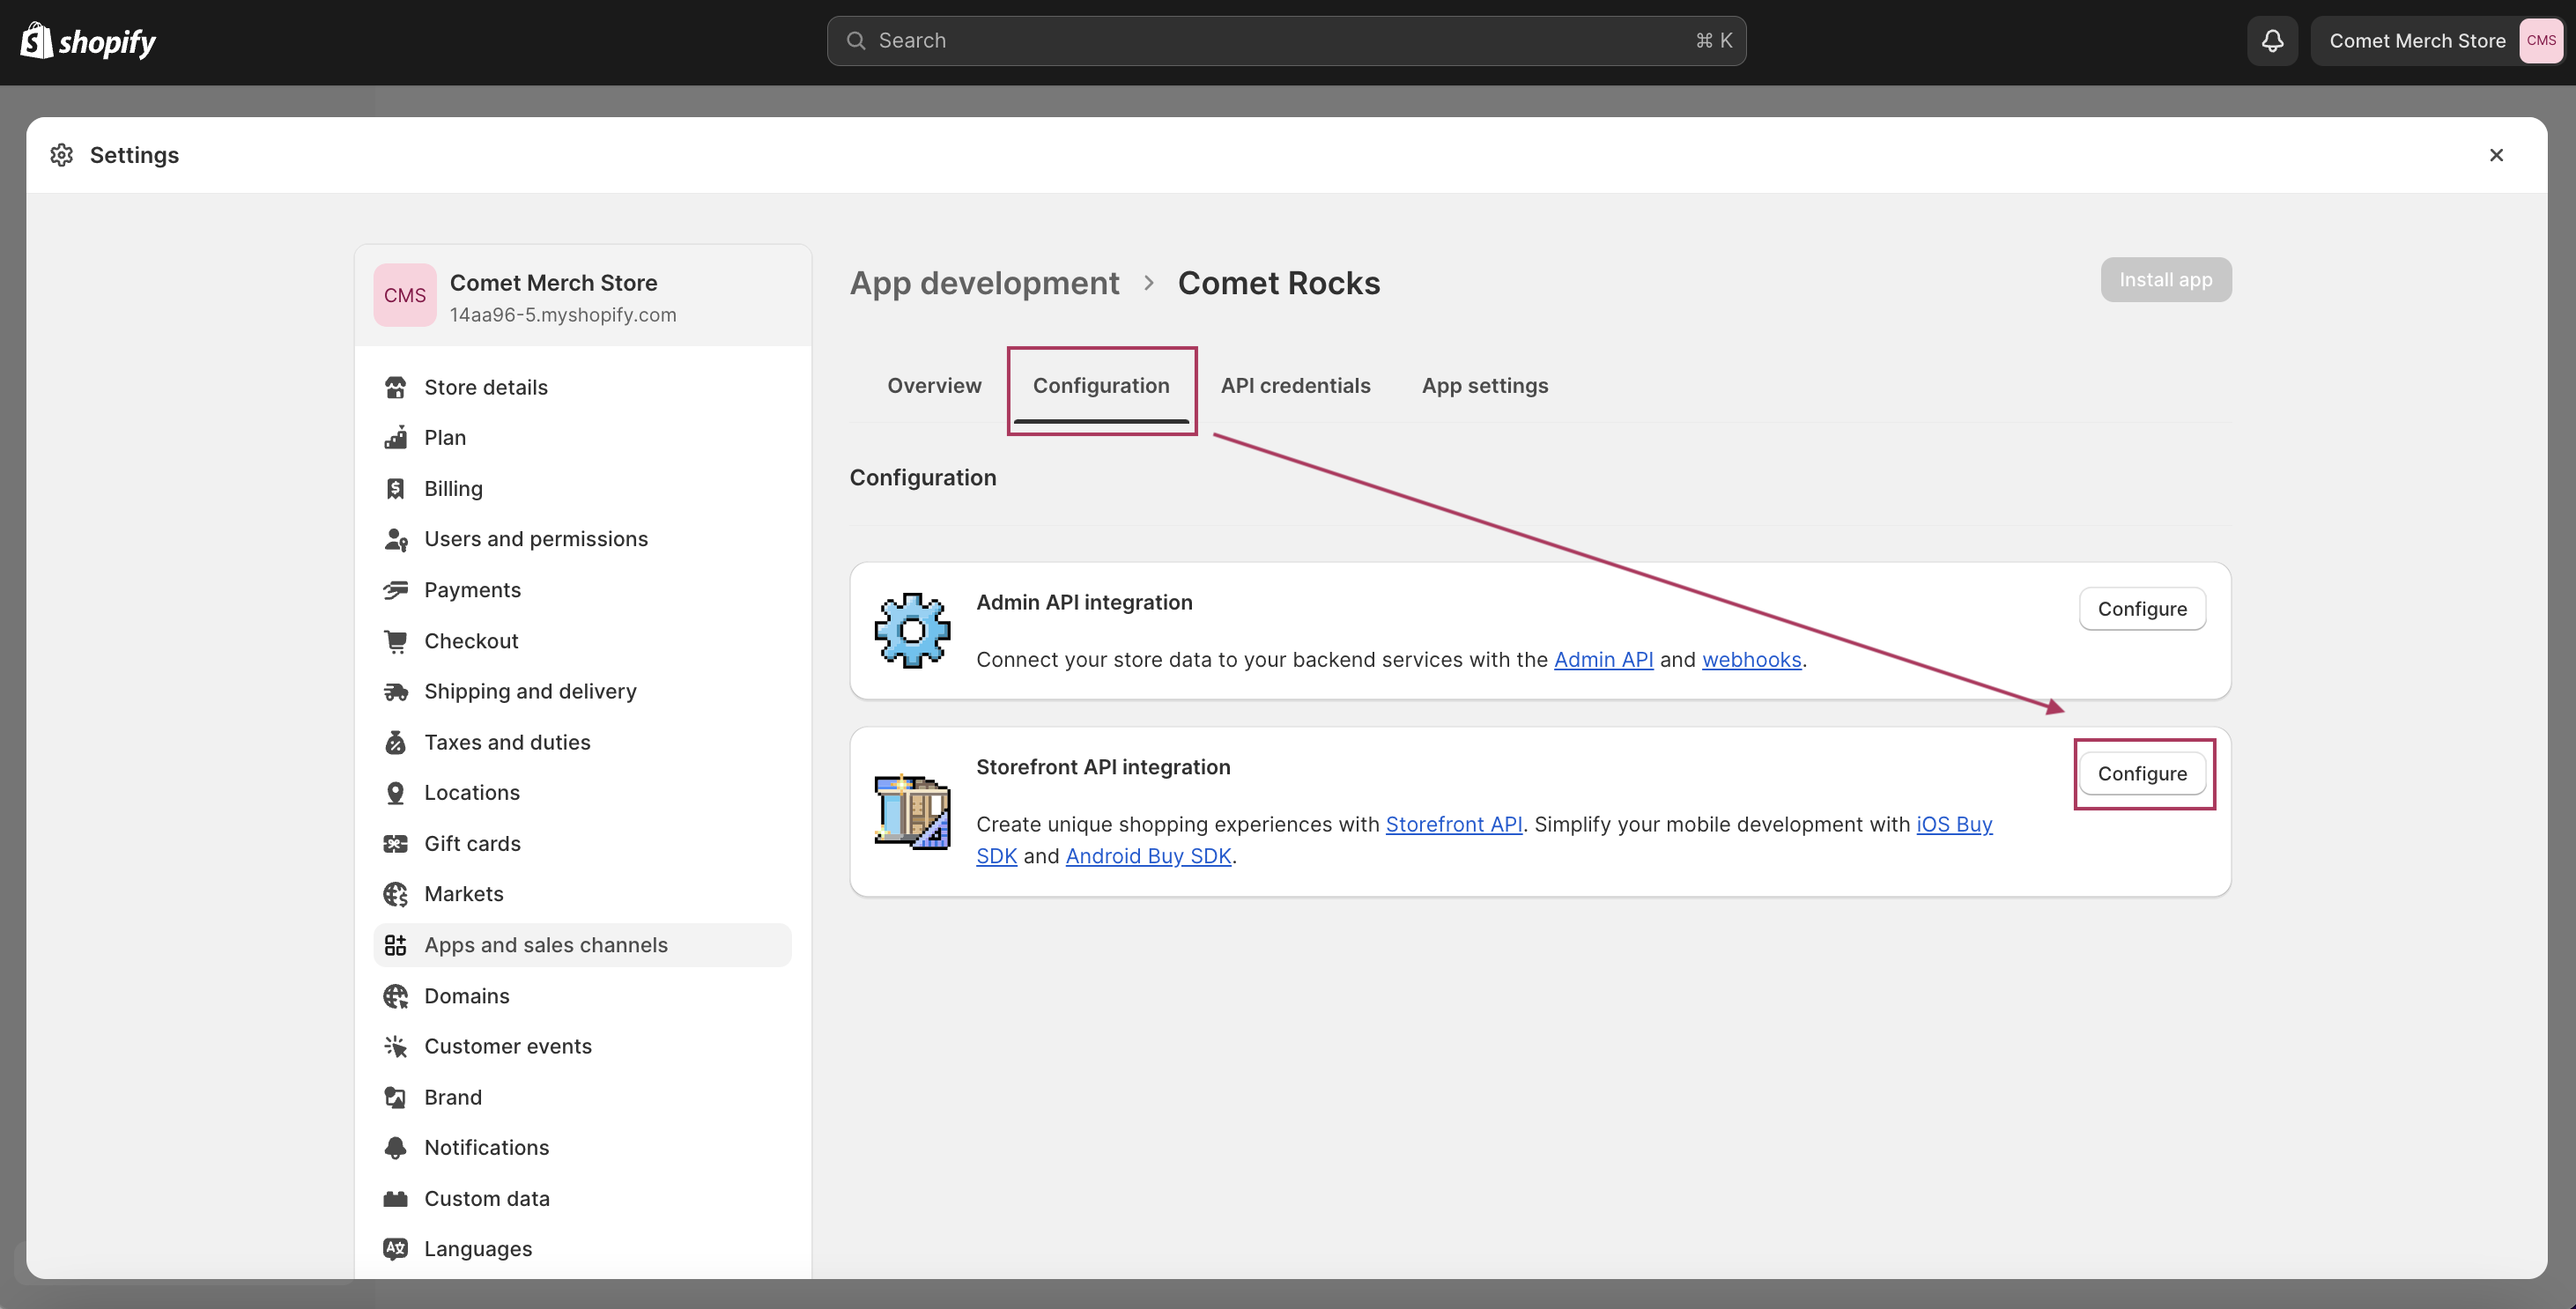
2.3. Configure Storefront API Access Scopes
Next, we will configure the Storefront API access scopes for the custom
Return to the Configuration tab in your app development settings. Find the Storefront API configuration section and click Configure.
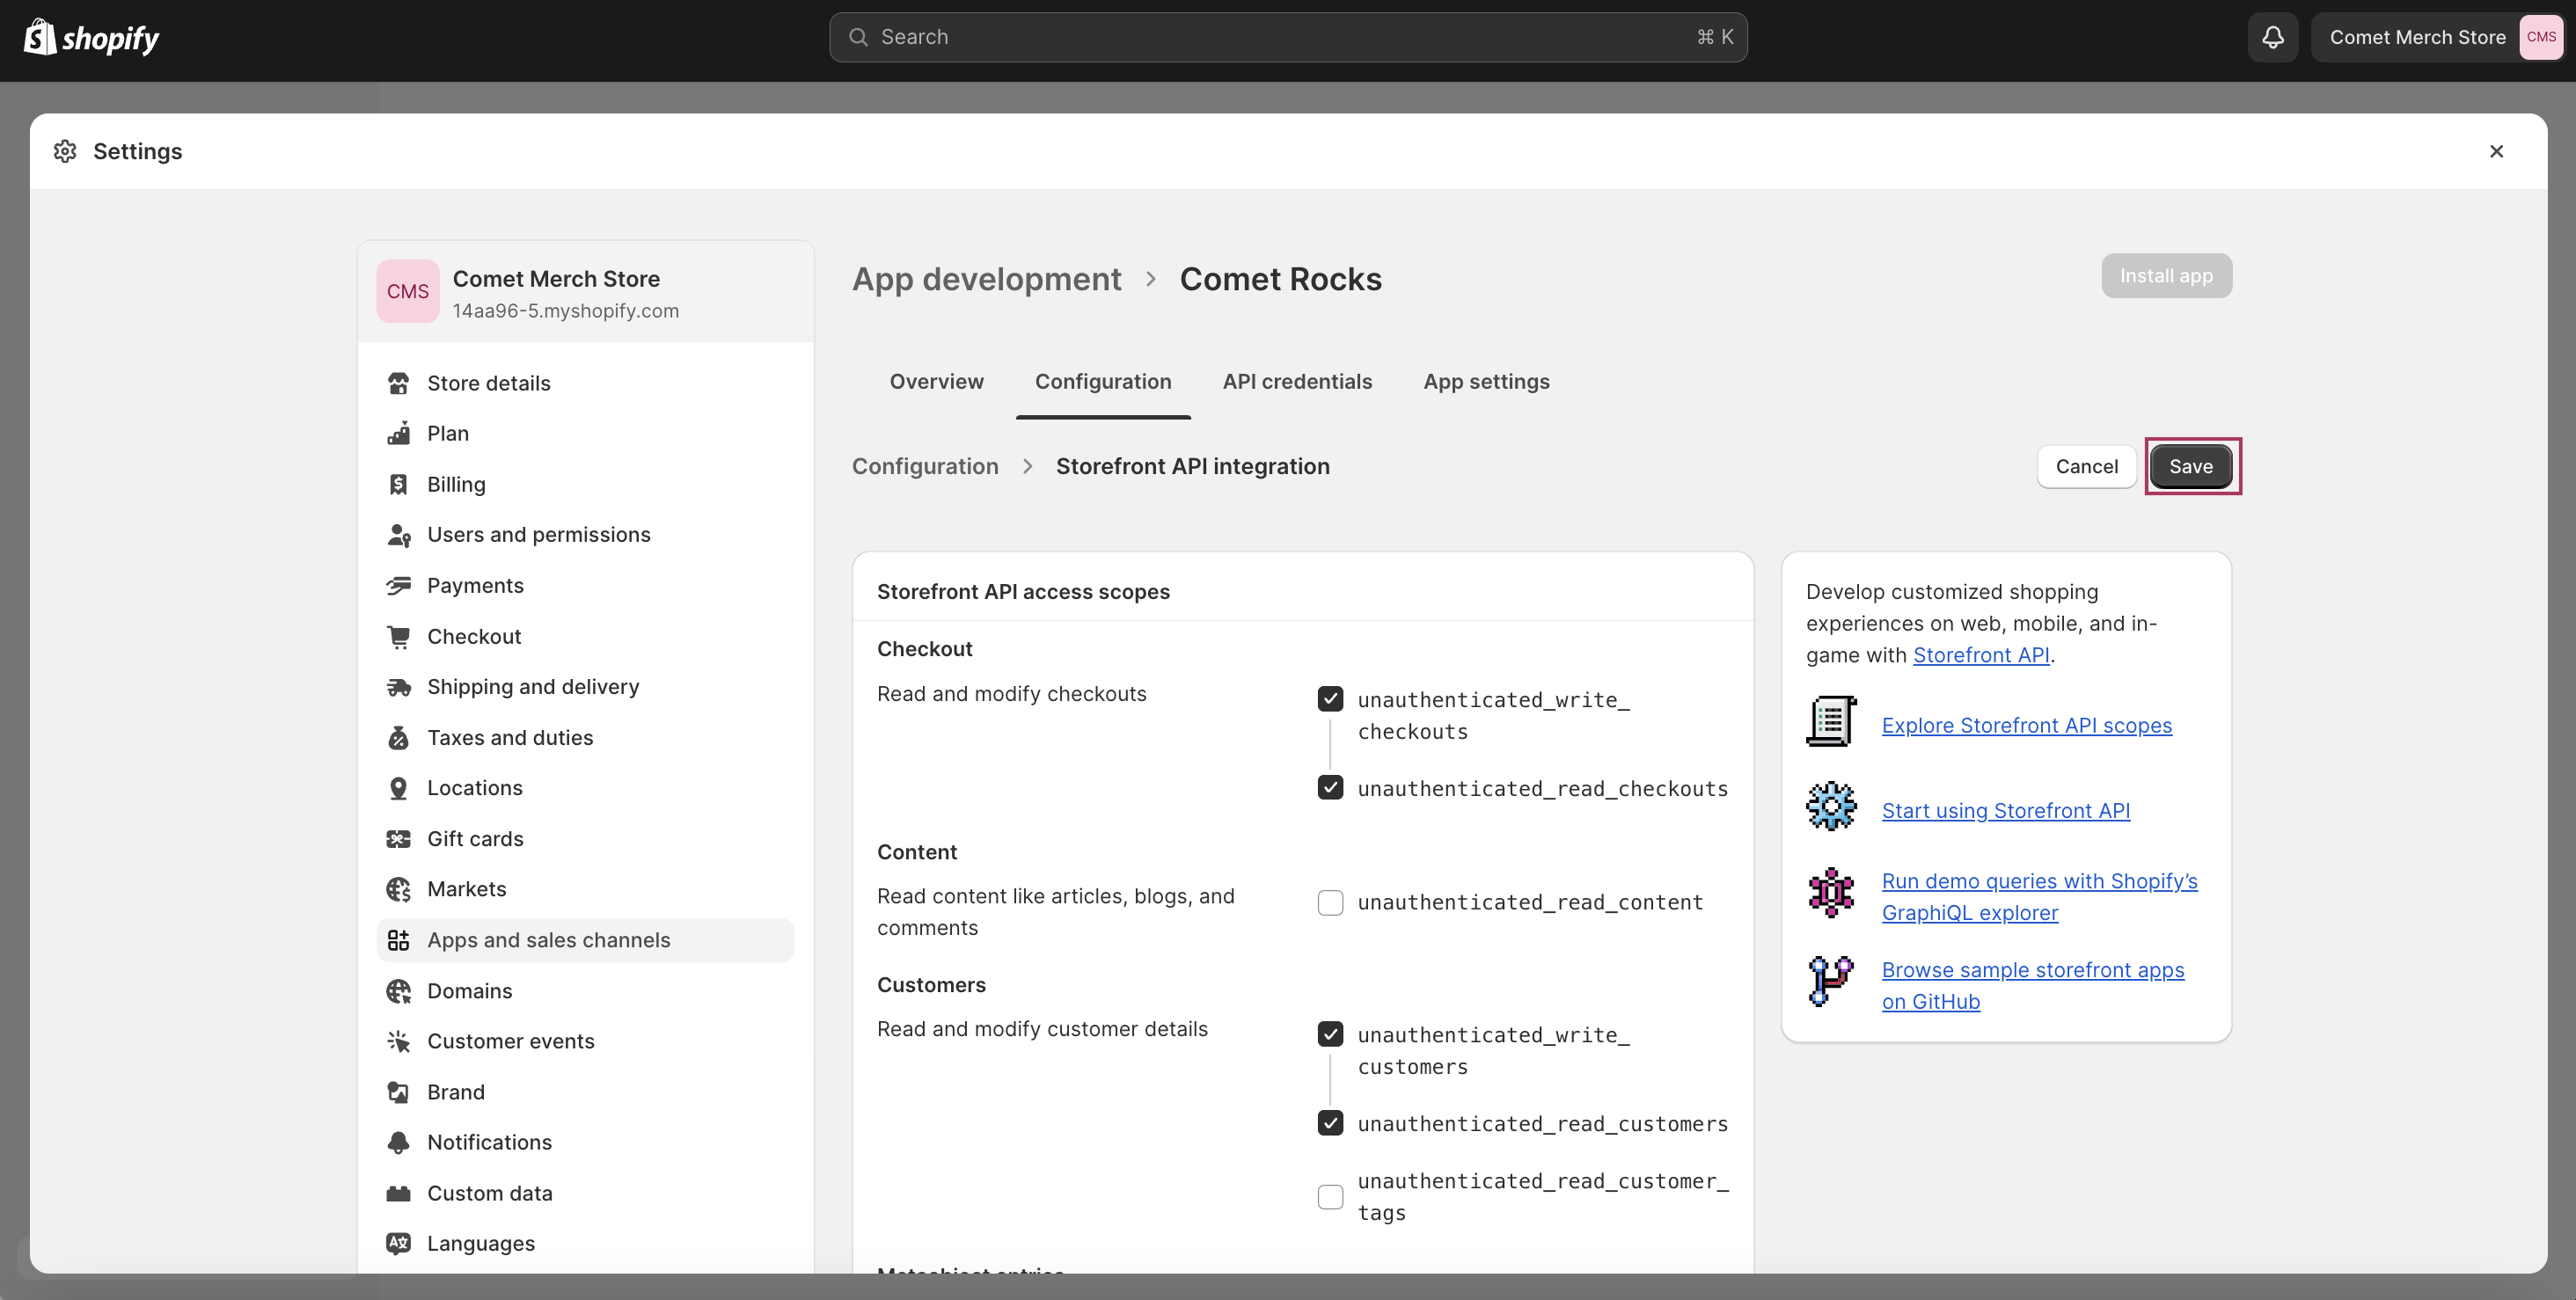
Here, find and select the following 2 access scopes:
Products:
unauthenticated_read_product_listingsSelling plans:
unauthenticated_read_selling_plans
Click Save to apply changes
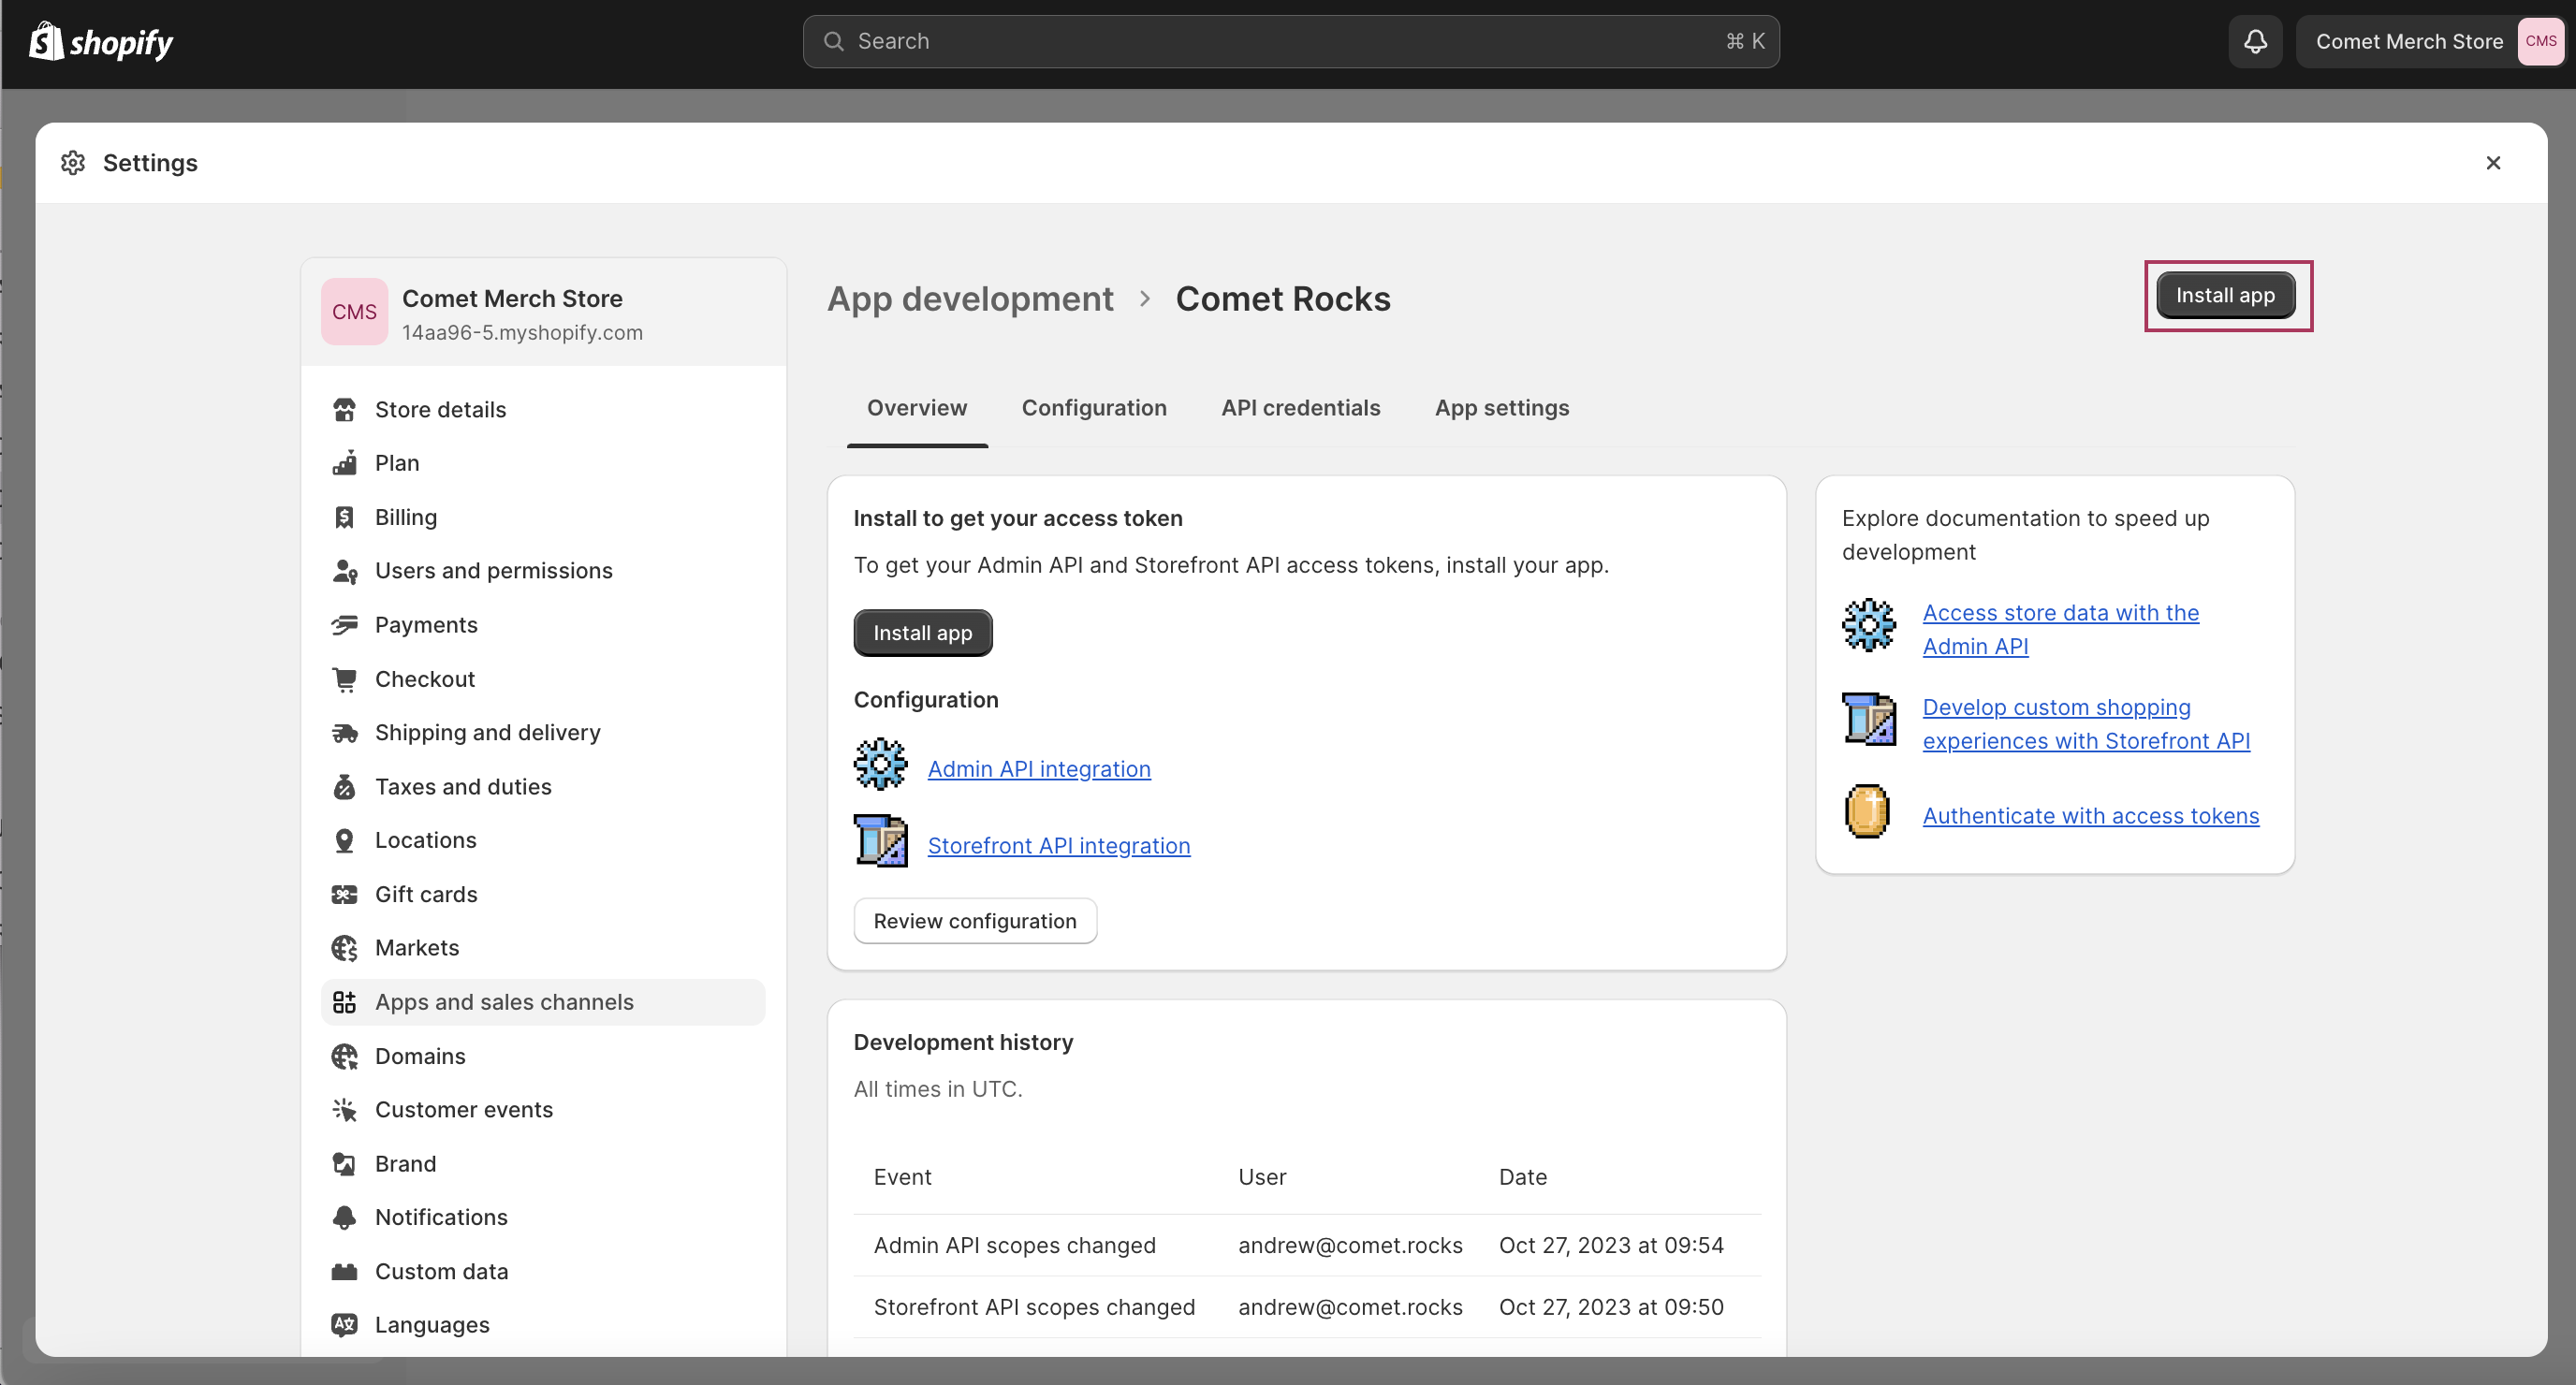
2.4. Install app
Once the access scopes are configured, install the app to generate the API credentials. In your app development settings, click on Install app and confirm the modal.
You're now ready to connect your Shopify store to Comet.
3. Submit API credentials in Comet
Finally, it's time to submit the API credentials from Shopify, to connect your store to Comet.
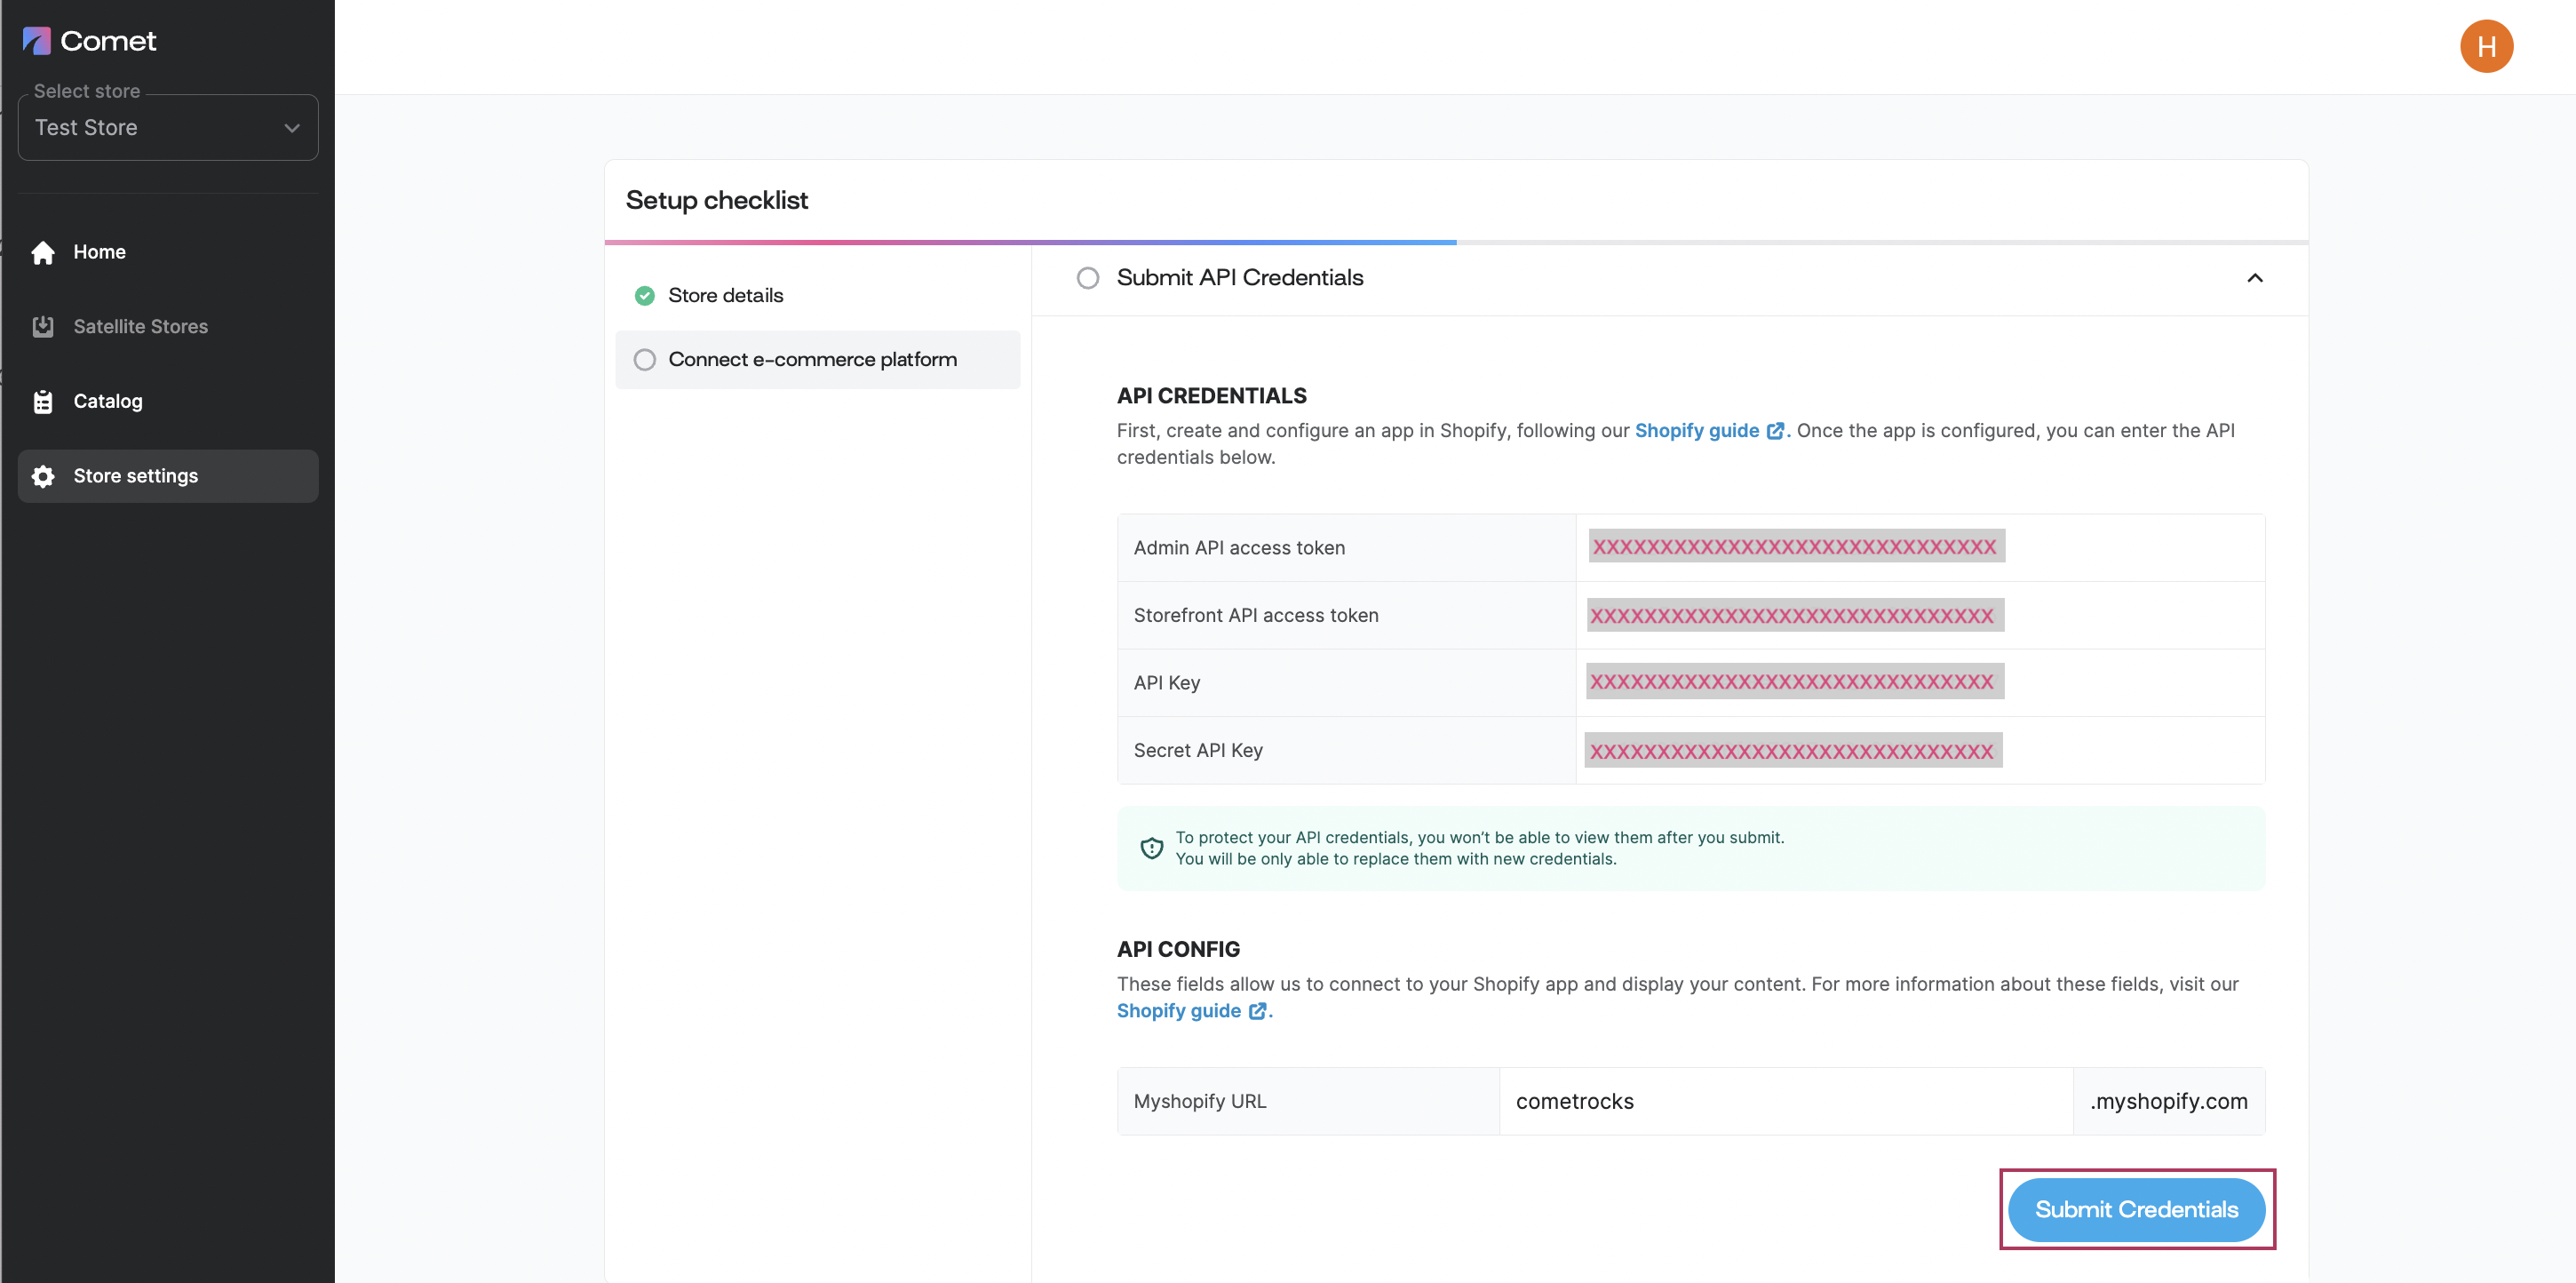
To get started, go back to Store Settings in Comet, and open the Submit API credentials toggle.
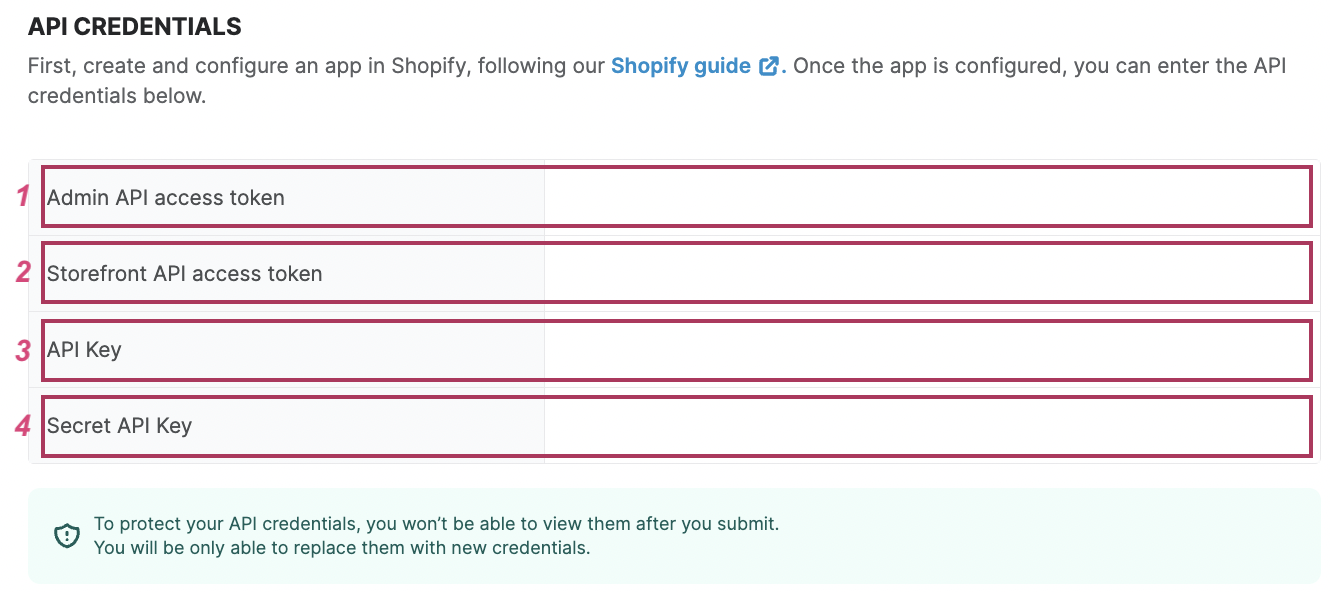
3.1. API credentials
First, submit the API credentials of your newly created app.
In Shopify, navigate to the API credentials tab in your app development settings.
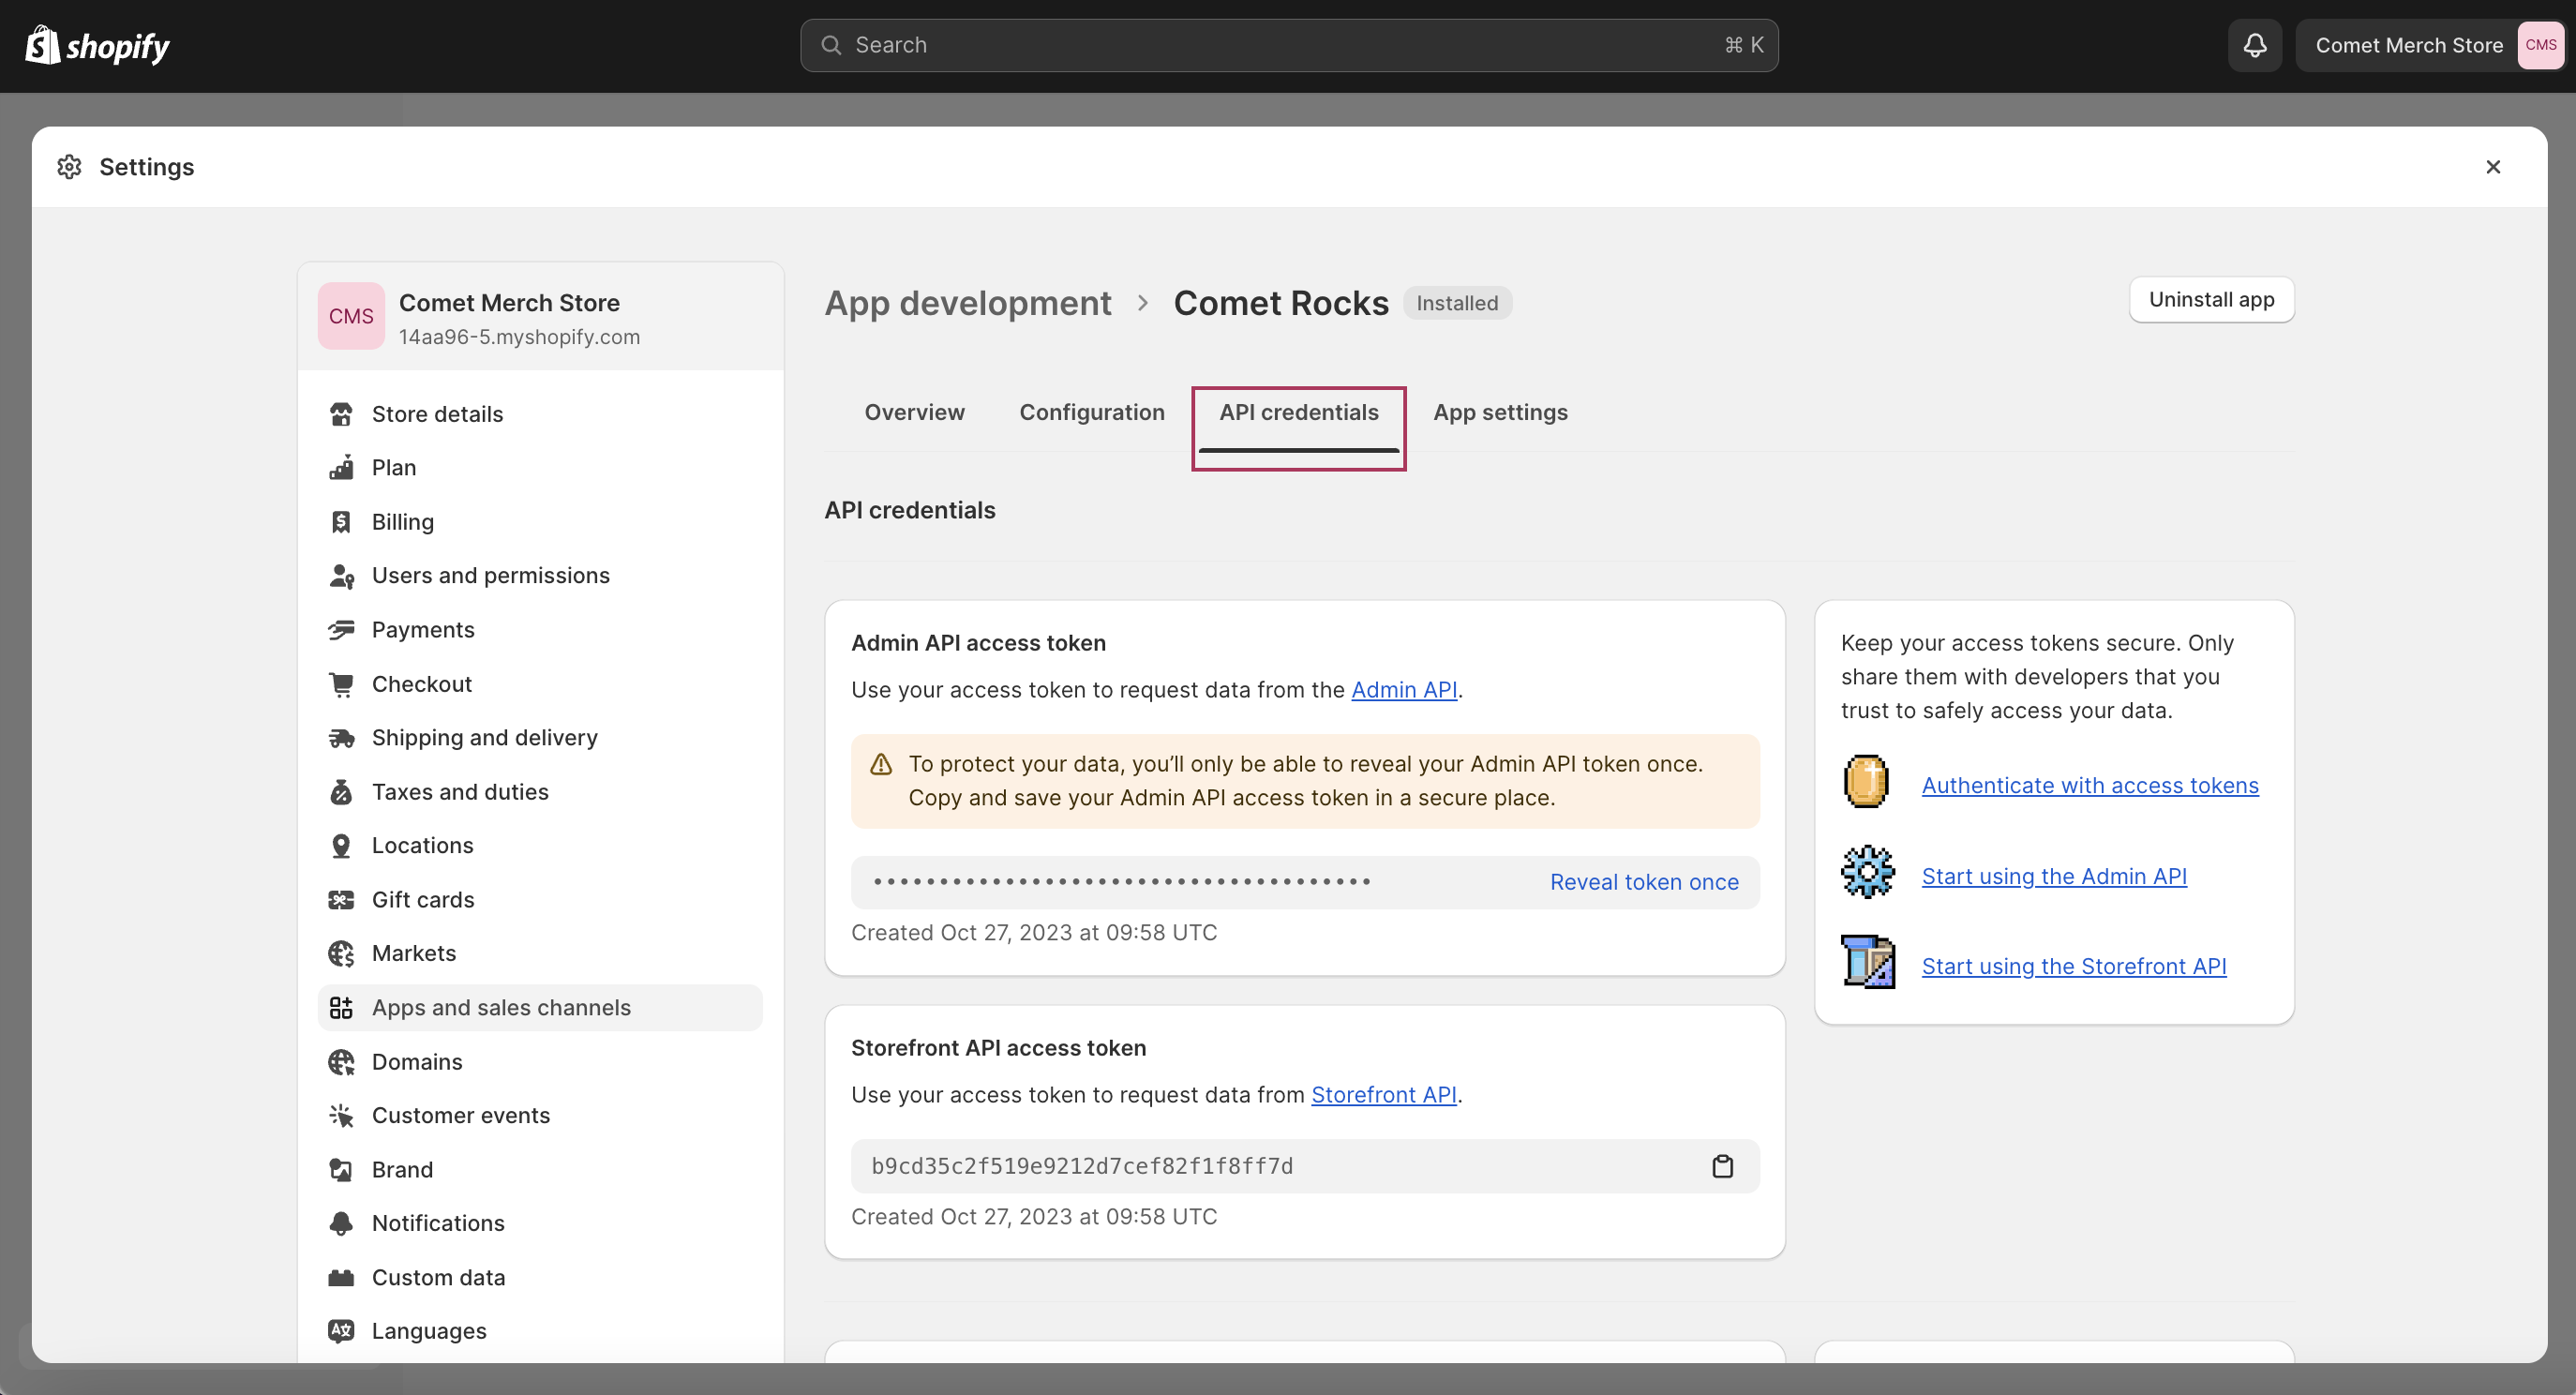
Copy the following API credentials and paste them into Comet:
Admin API access token,Storefront API access token,API key, andAPI secret key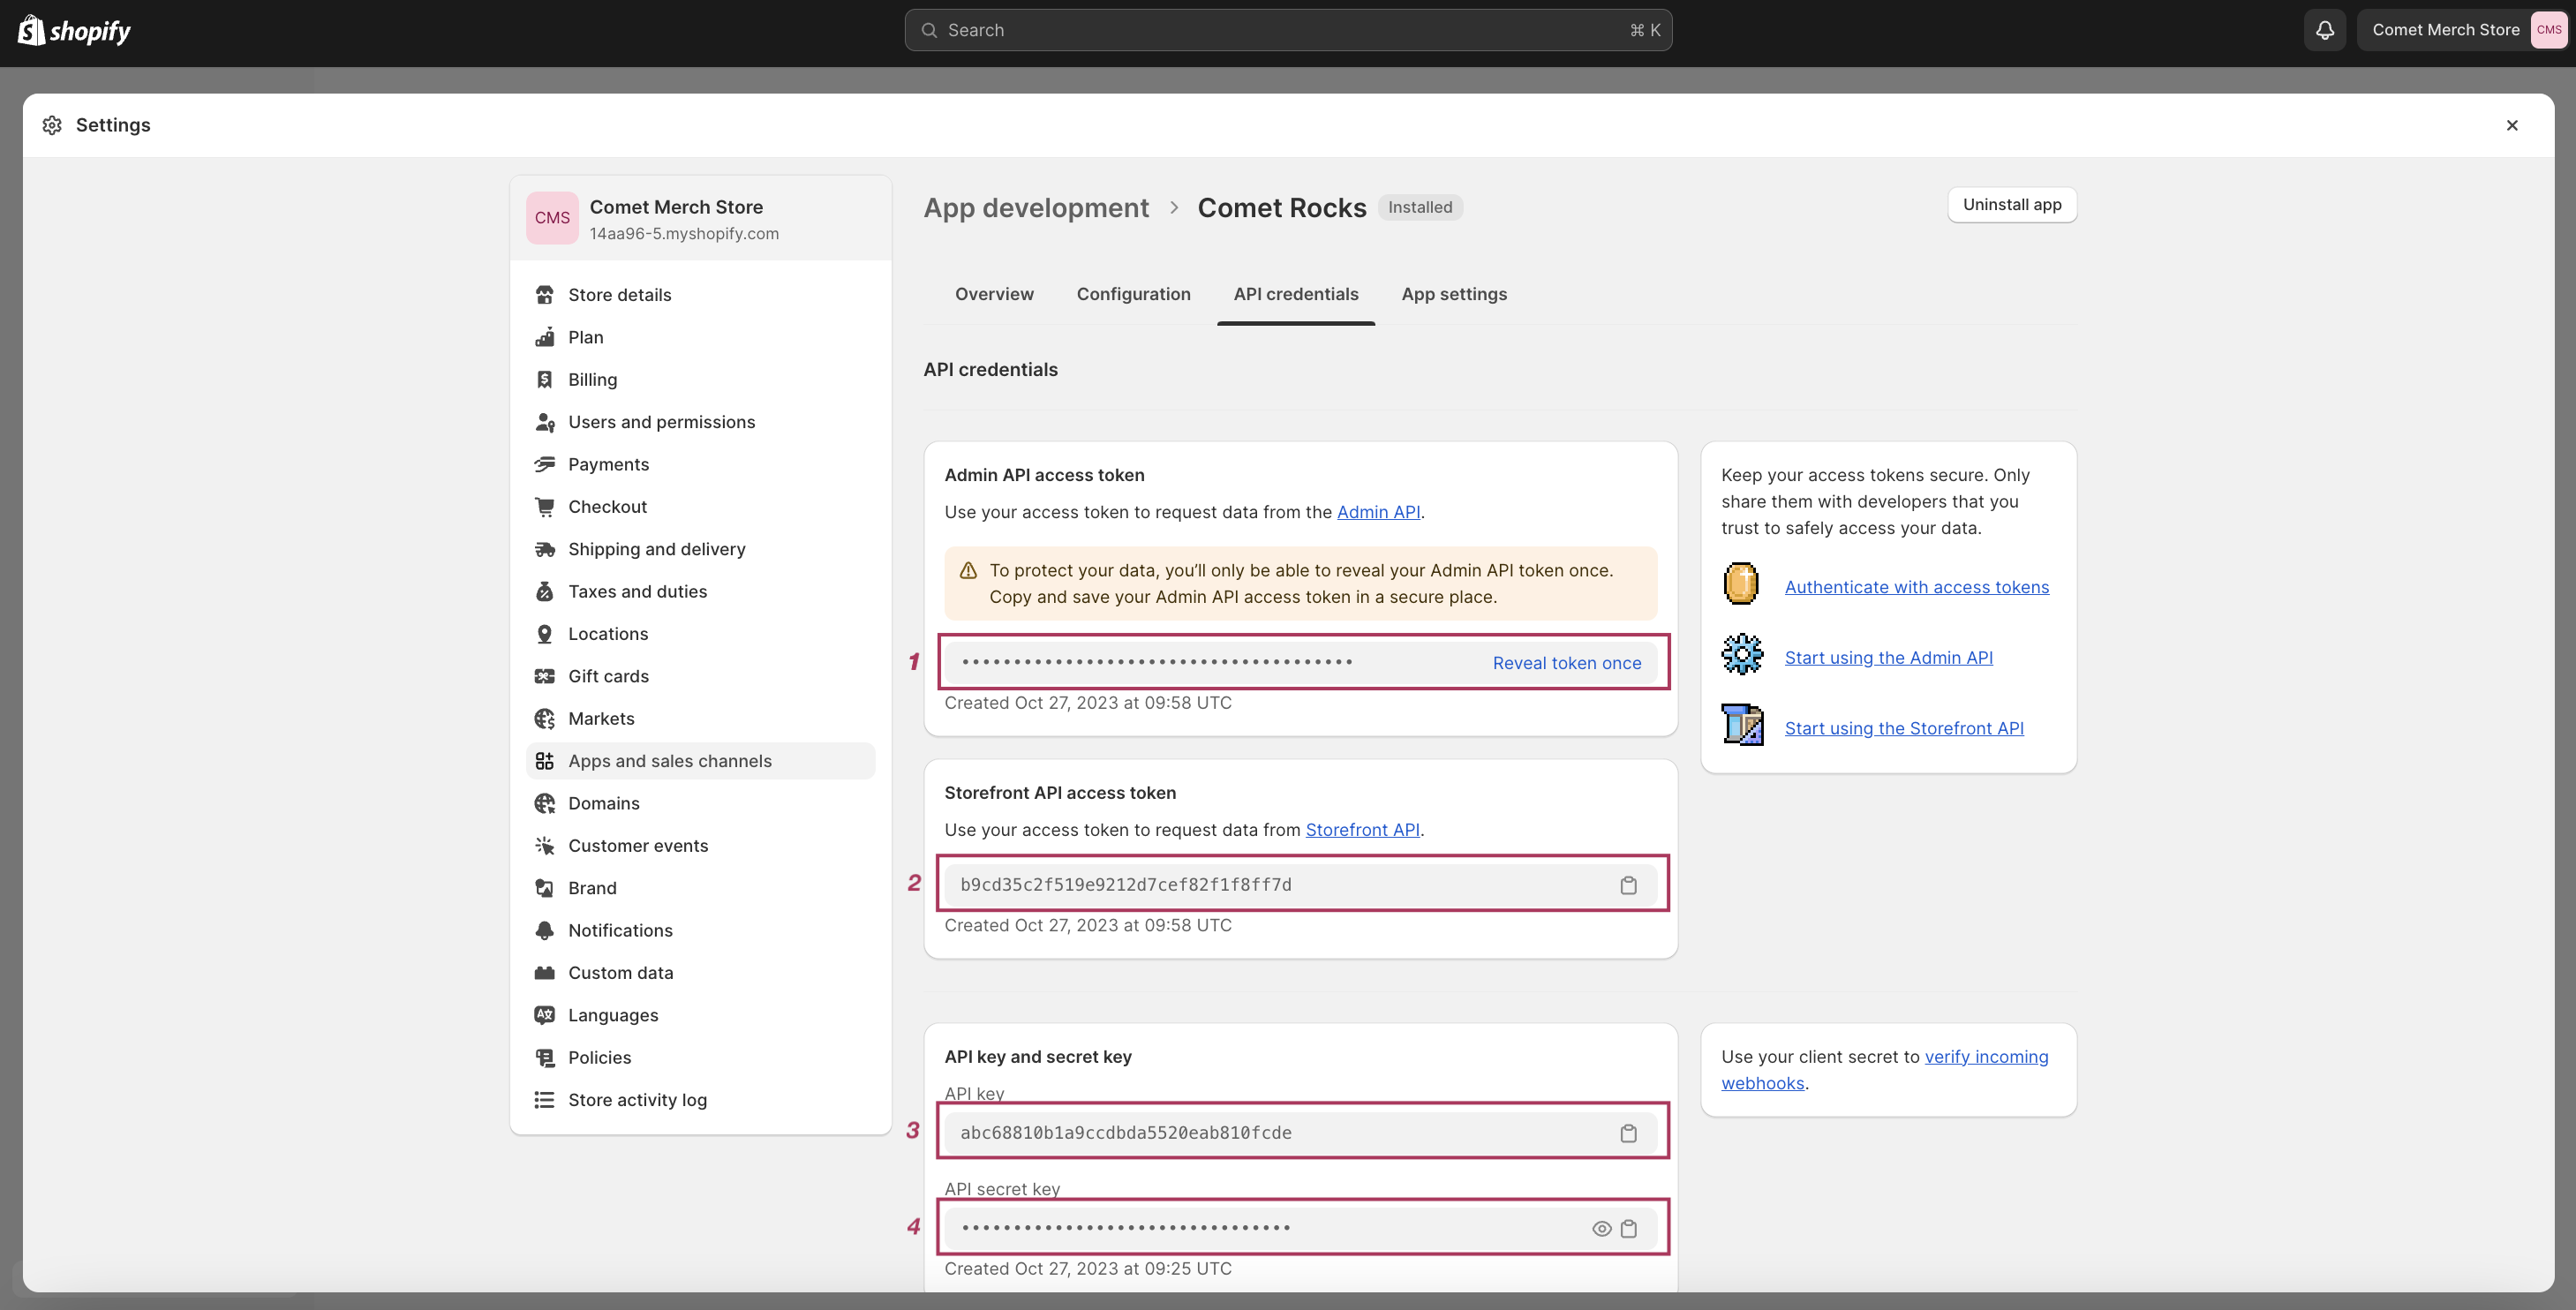
Heads up
The Admin API access token is sensitive, and it will only be shown once. Make sure you're ready to paste it into Comet before you reveal it.
3.2. API config
Next, under the API config section in Comet, provide the following credentials of your Shopify store.

MyShopify URL: Provide your MyShopify URL without the https:// and .myshopify.com. For example, if your URL is https://my-store.myshopify.com, enter my-store into the field.
- If you have trouble finding your MyShopify URL, go to Shopify -> Settings and it will be shown on the top left.
3.3. Submit credentials
Finally, click on Submit credentials and wait for a confirmation message.
Congratulations! You have successfully connected your Shopify store to Comet Rocks. Time to import your products catalog and create your first satellite stores.